
Planting
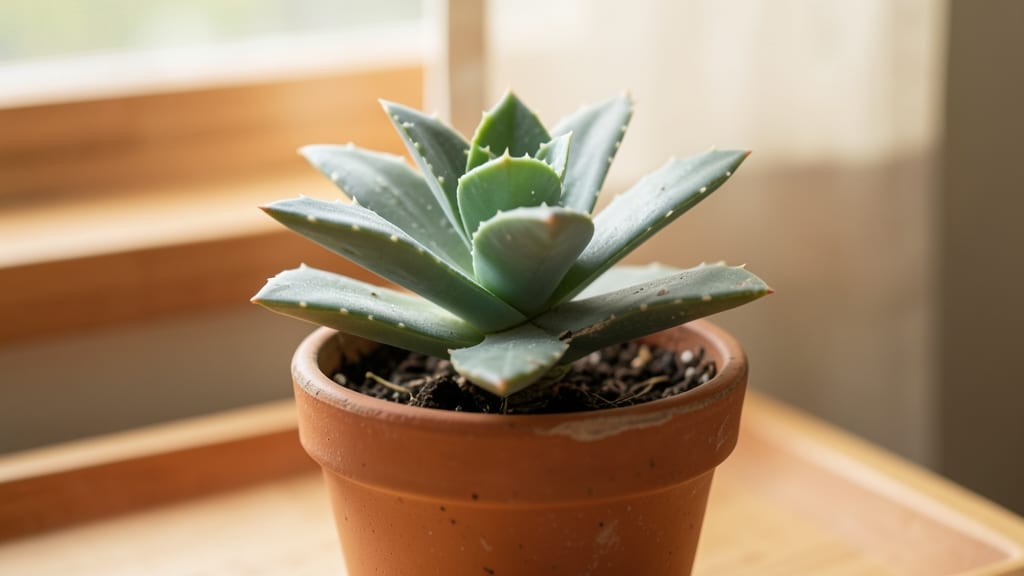
Growing a small aloe plant is the perfect way to bring desert resilience into your home—it thrives with less sunlight than you’d expect and barely needs water. 🌱 I’ve kept mine alive for years with just a sunny windowsill and occasional forgetfulness, proving aloe’s reputation as the ultimate beginner plant.
The secret lies in its soil: fast-draining cactus mix prevents root rot, while a 6-inch pot gives it room to grow without overcrowding. Water only when the soil feels bone-dry to the touch—about once every 3-4 weeks—and watch it reward you with thick, plump leaves packed with healing gel.
You’ll notice new growth within weeks, and those signature spiky leaves become a conversation starter. Even in low light, aloe adapts, though it grows slower. The real magic happens when you propagate pups—each tiny offset can become its own plant with minimal effort.
Perfect for apartments, offices, or even sunny patios. Let’s make yours the thriving centerpiece it’s meant to be!
📚 In This Guide
- What you need
- Instructions
- Tips and common mistakes
- Wrapping up and next steps
What you need
- ● Aloe vera pup (offset): 1–3 small pups (3–6 inches tall) from a mature aloe plant (ensure they’re healthy and free of damage).
- ● Well-draining potting mix: 1–2 gallons of a cactus/succulent blend (or add perlite/pumice to regular soil for drainage).
- ● Pot with drainage holes: 1 small pot (4–6 inches in diameter) for each pup. Terracotta or ceramic is ideal.
- ● Watering can or spray bottle: For gentle hydration (avoid soggy soil!).
- ○ Gloves (optional but recommended): Aloe sap can irritate skin—gardening gloves keep hands safe.
- ● Slow-release fertilizer: 1 packet of succulent-specific fertilizer (apply sparingly, 1–2 times a year).
- ● Peat pellets or coir discs: For a soilless growing medium if you prefer hydroponics.
- ● Humidity tray or pebbles: Helps maintain moisture in dry air (especially for low-light setups).
- ● Plant labels: To track varieties (e.g., Aloe vera vs. Aloe aristata).
- ● Grow lights (LED or fluorescent): If your space gets <1–2 hours of indirect light daily.
How to grow a thriving aloe plant indoors with minimal sunlight
Here’s how I keep my aloe plants happy and healthy—even in low-light spots!
🪴 Step 1: Choose the Right Pot and Soil Mix
Start with a pot that has drainage holes—aloe roots rot easily when they sit in soggy soil. I like terracotta because it breathes and helps prevent moisture buildup. The pot should be slightly larger than the aloe’s root ball, but not too big—too much extra soil holds too much water.
Use a well-draining cactus or succulent mix. If you’re using regular potting soil, mix in perlite or coarse sand (about 20% of the total mix) to improve drainage. The soil should feel gritty and dry out quickly between waterings. I fill the pot about ¾ full with this mix before adding the plant.
☀️ Step 2: Position Your Aloe for Low-Light Success
Aloe can handle bright, indirect light—think near an east-facing window or under a fluorescent bulb if natural light is scarce. Avoid deep shade, but don’t stress if your space is dim. I’ve kept aloe alive in office lighting by rotating the pot a quarter turn weekly so all sides get even exposure.
If you notice the leaves turning pale or stretching (a sign of etiolation), move the plant closer to the light source. Aloe leaves should stand upright, not lean. If your space is truly dark, consider a grow light—just keep it 6-12 inches away to avoid burning the leaves.
💧 Step 3: Water Sparingly and Only When Needed
Water your aloe only when the top 2 inches of soil are completely dry. Stick your finger in the soil—if it feels damp, wait another day. Overwatering is the #1 killer of aloe plants, so I water every 3-4 weeks in winter and every 2 weeks in summer. Less is always better!
When watering, soak the soil thoroughly until water drains from the bottom of the pot. Empty the saucer afterward to prevent root rot. You’ll know you’re doing it right when the soil feels dry 1-2 inches down after watering. Yellow or mushy leaves? That’s your cue to cut back on water.
✂️ Step 4: Prune and Propagate for a Healthier Plant
Remove any brown, dried, or damaged leaves at the base with clean scissors. Healthy aloe leaves should be thick, fleshy, and green with no spots. If the plant gets leggy, trim the top 1-2 inches and place the cutting in dry soil to root—it’ll sprout a new plant in 2-3 weeks!
Here’s the thing—aloe plants self-propagate when pups (baby plants) grow at the base. Gently twist them off and replant in their own pots. I’ve turned one aloe into four healthy plants this way! Just let the soil dry out completely before repotting to avoid shocking the roots.
🌱 Step 5: Fertilize Lightly and Watch for Pests
Feed your aloe once in spring and once in summer with a diluted succulent fertilizer (half the recommended strength). Too much fertilizer burns the roots, so I mix mine with water and apply it every 6-8 weeks. Skip fertilizing in fall and winter—aloe goes dormant and doesn’t need extra nutrients.
Check for pests like mealybugs or spider mites on the undersides of leaves. Wipe them off with a damp cloth or spray with neem oil if you spot any. Healthy aloe plants rarely get pests, but if the leaves develop sticky residue or white webbing, act fast—these bugs spread quickly.
Tips & tricks for perfect aloe small plant care
These little tricks will help your aloe thrive even when sunlight is scarce!
Pot Selection: Terracotta pots are ideal because they wick away excess moisture, but any pot with drainage holes works. I’ve used plastic pots successfully too—just make sure to empty the saucer immediately after watering to prevent soggy roots. If you’re repotting, choose a container that’s only slightly larger than the root ball to avoid overwatering issues.
Light Exposure: Aloe can handle office lighting, but rotate your pot a quarter turn weekly to ensure even growth. If you notice pale or stretching leaves, it’s time to move closer to the light source. For truly dark spaces, a simple LED grow light kept 6-12 inches away will work wonders—just 4-6 hours a day is enough to keep your aloe happy.
Watering Wisdom: The top 2 inches of soil should be completely dry before watering again. I test this by sticking my finger in the soil—if it’s damp, I wait another day. Overwatering is the biggest mistake people make, so when in doubt, wait! In winter, I water every 4-5 weeks, while summer’s heat means I water every 2 weeks. Always empty the saucer after watering to prevent root rot.
Soil Mix: A well-draining cactus or succulent mix is perfect, but you can make your own by mixing regular potting soil with perlite or coarse sand (about 20% of the total mix). This gritty texture mimics the aloe’s natural habitat and prevents waterlogging. I fill the pot about ¾ full with this mix to leave room for the plant’s root system to expand without excess soil holding moisture.
Pro Tips for Aloe Small Plant
- These little tricks will help your aloe thrive even when sunlight is scarce!
- Pot Selection: Terracotta pots are ideal because they wick away excess moisture, but any pot with drainage holes work...
- Light Exposure: Aloe can handle office lighting, but rotate your pot a quarter turn weekly to ensure even growth. If ...
Frequently asked questions
Got questions about keeping your aloe small plant happy? You’re in the right place! Here are answers to the most common queries—whether you’re a beginner or just need a quick refresh.
How often should I water my small aloe plant?
Water your aloe only when the soil is completely dry—usually every 2-3 weeks. Overwatering is the #1 killer of aloe! Stick your finger 1-2 inches into the soil; if it’s dry, give it a drink. In winter, reduce watering to once a month since growth slows.
Can I grow a small aloe plant indoors without sunlight?
Yes, but with caveats! Aloes thrive in bright, indirect light. If your space is dim, place it near a south- or east-facing window. Supplement with a grow light (12-14 hours/day) if needed. Yellowing leaves? It’s likely craving more light!
How do I propagate my small aloe plant?
Propagating is easy! Snip a healthy puppy (baby plant) from the base with clean scissors. Let the cut end dry for 1-2 days, then place it in well-draining soil. Keep it barely moist until roots form (2-4 weeks). No soil? Try water propagation in a jar!
Why are my aloe leaves turning brown or mushy?
Brown tips = underwatering or low humidity; trim them off. Mushy, soft leaves = overwatering or root rot. Let the soil dry out completely, and repot in fresh, cactus/succulent mix if needed. Ensure the pot has drainage holes!
What are good alternatives to aloe for low-light spaces?
If aloe struggles, try these low-maintenance pals:
- Snake Plant (Sansevieria): Thrives in near-darkness, drought-tolerant.
- ZZ Plant (Zamioculcas): Nearly indestructible, grows slowly.
- Pothos (Epipremnum): Fast-growing, trails beautifully.
- Cast Iron Plant (Aspidistra): Survives neglect and poor light.
Wrapping up and next steps
Growing a small aloe plant indoors is a rewarding experience—even with minimal sunlight! With the right pot, soil, and care, your aloe will thrive while adding a touch of greenery to your space.
Whether you’re a beginner or a plant enthusiast, this low-maintenance plant is perfect for brightening up any corner.
Ready to take the next step? Start with a healthy aloe pup and watch it grow into a stunning, resilient plant. Share your progress with fellow plant lovers or explore more indoor gardening tips—your green thumb journey is just beginning! 🌱✨