
Planting
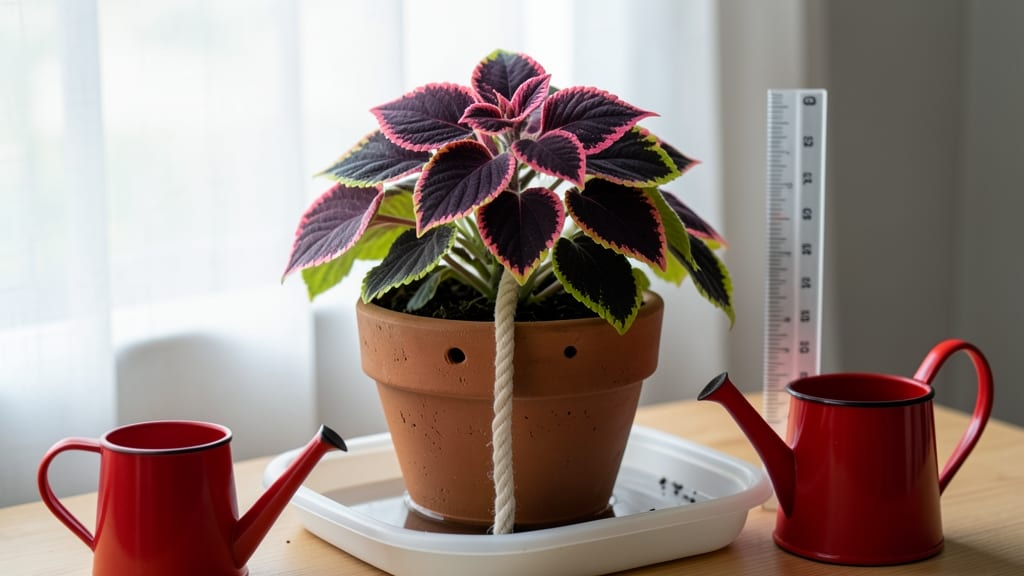
How to make a self-waterer for your plants—your greens stay hydrated without you lifting a finger. This self-watering hack saves time and keeps roots happy even when you forget. 🌱 I’ve tested it with everything from wilting herbs to thirsty tomatoes, and the results speak for themselves: no more crispy leaf edges or drowned soil. The magic comes from a simple wick system using materials you already have—a plastic bottle, some string, and a container. No fancy tools, no expensive kits, just a setup that delivers water exactly when plants need it. Perfect for busy gardeners, frequent travelers, or anyone tired of watering reminders. You’ll end up with a foolproof system that cuts watering by 70% while preventing root rot. The best part? It works for herbs, veggies, and even ferns—just adjust the bottle size and wick length. No more guessing when to water again. Fair warning: succulents hate this method (they need dry spells), but for everything else, it’s a game-changer. Let’s build one that’ll last all season.
📚 In This Guide
- What you need
- Instructions
- Tips and common mistakes
- Wrapping up and next steps
What you need
- ● Plastic bottle (16–32 oz) – Clean, empty, and with a cap (e.g., soda or water bottle). Tip: Choose one with a narrow neck for better control! 💡
- ● Scissors or box cutter – For precise cuts (safety first—adult supervision recommended!). ⚠️
- ● Drill or large nail – To poke a small hole in the bottle cap (¼-inch diameter works best).
- ● Wick material – Choose one of these: Cotton rope or twine (¼-inch thick, 12–18 inches long)
- ● Absorbent paper towels or coffee filters (cut into strips)
- ● Container with drainage holes – A pot or tray (6+ inches deep) to hold soil and the bottle.
- ● Potting soil – Well-draining mix suitable for your plant type.
- ● Plant – Any thirsty houseplant (e.g., succulents, herbs, or ferns).
- ● Funnel – Makes refilling the bottle easier (especially for wider-mouth bottles).
- ● Decorative cover – Paint or wrap the bottle to match your decor!
- ● Multiple bottles – For larger plants or multi-tiered setups.
- ● Water level indicator – Use a straw or marker to track remaining water.
Step-by-step instructions for building a DIY self-watering system
Here’s how to create a simple, no-fuss self-waterer that keeps your plants happy without daily attention.
🪴 Step 1: Gather Supplies for the Reservoir System
You’ll need a large plastic bottle (1-2 gallons)—the bigger, the longer it lasts—along with a small pebble or gravel layer and a drill with a small bit. I like to use a 1-liter soda bottle for smaller pots or a 2-liter for larger containers. Cut the bottle horizontally about 1 inch from the bottom to create a reservoir.
Poke 2-3 small holes in the cap (not the bottle itself) using the drill. These holes will allow water to slowly seep out when the plant’s soil dries. If you don’t have a drill, carefully melt the plastic with a heated needle or nail—just be patient and steady to avoid burning the plastic.
💧 Step 2: Assemble the Bottle and Prepare the Pot
Place the pebbles or gravel (about 1 inch deep) into the bottom of your plant pot. This layer keeps the soil from clogging the holes in the bottle cap. Flip the top portion of the bottle (the part you cut off) upside down and place it into the pot, nestling it into the pebbles so it sits securely but doesn’t touch the soil.
Fill the bottle with water—3/4 full is ideal—then screw the cap back on. The water will start to seep through the holes in the cap and into the pebbles, creating a moisture barrier. This ensures the soil stays damp but not soggy, which is key for preventing root rot.
☀️ Step 3: Position the Bottle and Test the System
Place the bottle’s reservoir (the bottom half) upside down into the pot, with the cap-side facing up. The cap should sit just above the soil line—this prevents the soil from blocking the holes and ensures a steady, slow release of water. If your pot has drainage holes, place a plastic mesh or coffee filter over them to keep pebbles from falling out.
Water your plant normally for the first 24 hours to help it adjust. Then, fill the bottle reservoir again and watch how the water levels drop over the next few days. You’ll notice the soil stays consistently moist, but not waterlogged—this is the sweet spot for most houseplants. Refill the bottle every 1-2 weeks, depending on your plant’s size and your home’s humidity.
⏰ Step 4: Monitor and Adjust for Optimal Performance
Check the system weekly to ensure the bottle isn’t empty and the pebbles aren’t drying out. If the soil feels dry too quickly, your bottle may need more holes in the cap or a larger reservoir. For thirsty plants like succulents, you might need to add a second bottle or increase the hole size slightly.
This setup works best for medium to large houseplants that need consistent moisture, like pothos, snake plants, or ferns. Avoid using it for cacti or other desert plants—they prefer dry soil and won’t thrive with this method. If you notice mold or a musty smell, empty the reservoir, clean the bottle, and refill with fresh water.
Tips & tricks for perfect DIY plant self-waterers
After setting up my first self-watering system and watching my pothos thrive without daily watering, I learned these game-changing details that make all the difference.
Hole Size Matters: The 2-3 small holes in the bottle cap are crucial—they should be just big enough to let water drip slowly when the bottle is upside down. If you notice water flowing too quickly, use a toothpick to enlarge the holes slightly. For thirstier plants like ferns, you can carefully widen one hole to about the size of a pencil tip. Too many large holes will waterlog the soil, while too few will leave your plant parched.
Material Choice for Longevity: While plastic bottles work perfectly, glass bottles can be a great alternative if you're concerned about plastic leaching over time. Just make sure to use a glass bottle with a secure, leak-proof cap. For outdoor use, consider using food-grade plastic containers designed for long-term water storage—they're more durable and won't degrade in sunlight as quickly as soda bottles.
The 24-Hour Adjustment Period: That initial 24-hour normal watering period is your plant's chance to acclimate to the new moisture system. During this time, observe how quickly the water level drops—this will give you a good idea of how often you'll need to refill. Some plants may need a full refill after just 5 days, while others might last 2 weeks. The key is to watch your plant's leaves for wilting, which is your first sign that adjustments are needed.
Cleaning and Maintenance: Every 2-3 months, disassemble your system completely to clean the bottle and pebbles. Rinse everything with a 1:10 bleach-to-water solution to prevent algae growth, then rinse thoroughly. This prevents mold and keeps your water fresh. I also recommend replacing the pebbles every 6 months—they can start to break down and lose their moisture-wicking properties over time.
Pro Tips for Make A Plant Self Waterer
- After setting up my first self-watering system and watching my pothos thrive without daily watering, I learned these ...
- Hole Size Matters: The 2-3 small holes in the bottle cap are crucial—they should be just big enough to let water drip...
- Material Choice for Longevity: While plastic bottles work perfectly, glass bottles can be a great alternative if you'...
Frequently asked questions
Got questions about DIY self-watering systems? You’re not alone! Here are answers to the most common concerns—so you can keep your plants happy with minimal effort.
How often should I refill the water reservoir?
It depends on your plant’s needs and climate! For most setups, refill every 1–2 weeks in warm weather or 3–4 weeks in cooler months. Monitor soil moisture—if the top inch feels dry, it’s time to top up. Pro tip: Use a clear bottle to track water levels easily!
Will this work for all types of plants?
Yes, but with a few tweaks! Succulents and cacti need less water—opt for a wick-based system. Large tropical plants (like monsteras or ferns) thrive with a wick or bottle system. Avoid overwatering moisture-sensitive plants (e.g., orchids) by adjusting reservoir size or using a slow-drip setup.
What if my self-waterer stops working?
Troubleshoot with these fixes:
Clogged wick? Rinse it in vinegar or replace it.
Leaks? Check seals or adjust bottle placement.
Stagnant water? Add a few drops of hydrogen peroxide to prevent bacteria.
Slow flow? Ensure the wick isn’t kinked or the bottle isn’t upside-down.
Most issues are easy to fix—just observe and adjust!Can I use a self-waterer for outdoor plants?
For outdoor use, choose a durable setup (like a buried bottle system or a terra-cotta pot wick). Protect components from pests (e.g., rodents) by using metal mesh or elevated designs. Warning: Extreme heat or frost may require seasonal adjustments!
Is it cheaper than buying a store-bought self-waterer?
Yes! A DIY system costs $5–$15 (using household items) vs. $20–$50+ for pre-made ones. Plus, you customize it for your plant’s exact needs. Bonus: Repurpose old bottles, jars, or even a clean milk carton to save even more!
Will this work in very hot or cold climates?
Yes, but with adaptations:
- Hot climates: Use a larger reservoir or add ice cubes to slow evaporation.
- Cold climates: Bury the reservoir or insulate it with foam to prevent freezing. Avoid wicks in freezing temps—they can crack!
Wrapping up and next steps
Creating a DIY self-watering system is a game-changer for busy plant parents! With just a few household items, you’ve unlocked effortless hydration that keeps your greens happy—no more guesswork or forgotten watering. 🌱✨
Now that you’re armed with the know-how, why not take it a step further? Try experimenting with smart upgrades—like adding a moisture sensor or a decorative touch—to make your setup even more personalized. Your plants (and future plant babies!) will thank you.