
Planting
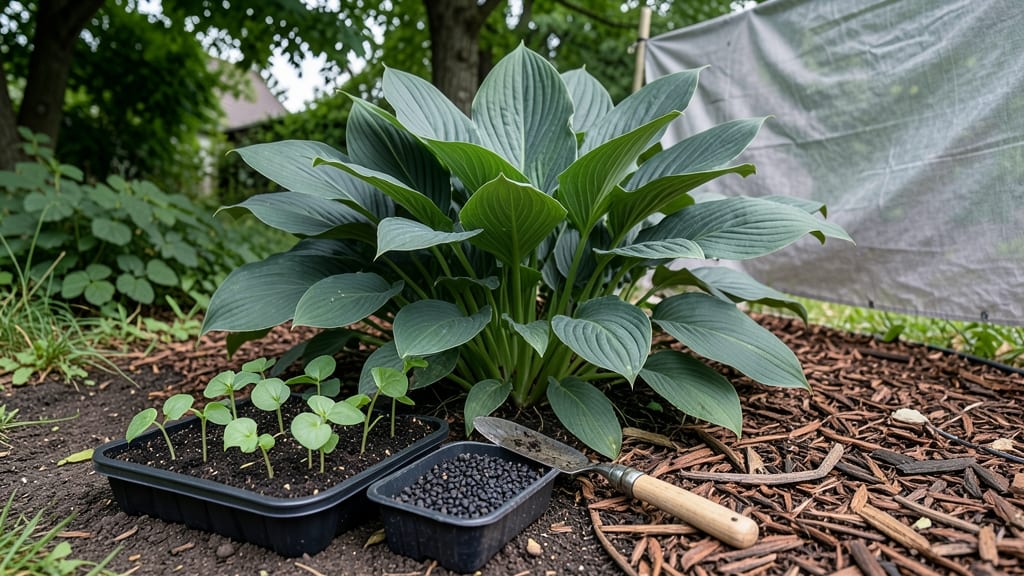
Growing hosta seeds as a perennial shade plant means lush foliage in three years—not the instant gratification of divisions. 🌱 I’ve learned the hard way that patience pays off: those tiny seeds packed with potential need cold treatment and consistent moisture to break dormancy.
The key is mimicking nature’s timing, which is why I start mine in late winter under refrigeration before transplanting into shade gardens.
You’ll need a seed-starting mix that drains well but holds moisture, small pots or a seed tray, and a clear plastic bag to create humidity.
Hostas thrive in shade, but their seeds need light to germinate—so keep them in a bright spot (not direct sun) while waiting for those first specks of green, which can take 4-8 weeks.
The real magic happens when you move them outside after last frost, where their broad leaves will eventually cast their own shade.
By year three, you’ll have bold, textured foliage in every shade from chartreuse to deep blue-black, depending on the variety. The trick is keeping soil consistently moist (but not soggy) and protecting young plants from slugs, which see them as all-you-can-eat buffets.
With proper care, your hostas will spread slowly but surely, creating that dreamy woodland garden effect you’ve been craving.
This method works best for Zone 3-9 gardeners, though northern growers may need extra winter protection. If you’re impatient like I was, consider layering seeds (planting some now and some later) to stagger growth—but remember, the wait is worth the decades of low-maintenance shade coverage that follows.
📚 In This Guide
- What you need
- Instructions
- Tips and common mistakes
- Wrapping up and next steps
What you need
- ● Hosta seeds – Choose heirloom or hybrid varieties (e.g., 'Blue Angel,' 'Francee,' or 'Halcyon'). Aim for 10–20 seeds per variety for experimentation.
- ● Seed-starting mix – A lightweight, sterile potting soil (e.g., 50% peat moss + 50% perlite) to prevent damping-off.
- ● Seed trays or small pots – 2–3 inch deep with drainage holes (e.g., 6–12 cell trays or 4-inch pots).
- ○ Clear plastic domes or plastic wrap – To create a humid microclimate (optional but highly recommended).
- ● Spray bottle – For gentle watering (avoid overhead streams).
- ○ Fine-mesh sieve or sifter – Helps sow tiny seeds evenly (optional but handy).
- ● Grow lights or LED bulbs – 12–16 hours/day (e.g., full-spectrum LED) for indoor starts.
- ○ Heat mat (optional) – 70–75°F soil temp speeds germination (great for cold climates!).
- ● Thermometer – To monitor soil and air temps (ideal range: 65–75°F).
- ● Garden tweezers or toothpick – For precise seed placement (hosta seeds are microscopic!).
- ● Patience – Hosta seeds take 30–90 days to germinate (some varieties are slow!).
- ● Consistent moisture – Keep soil evenly damp (not soggy) to avoid fungal issues.
- ● Indoor setup (if starting early) – A sunny windowsill or grow light for 4–6 weeks before transplanting.
- ● Shade-tolerant location – Hostas thrive in partial to full shade (dappled sunlight is ideal).
Step-by-Step instructions for germinating hosta seeds in shade
Hostas from seed take patience, but this cold-stratification method ensures strong, vigorous plants ready for years of shade.
🌱 Step 1: Prepare Seeds with Cold Stratification
Hostas require a 60-90 day cold period to break dormancy—nature’s way of timing germination with spring. Place seeds in a sealed plastic bag with slightly damp peat moss or coconut coir (just enough moisture to feel like a wrung-out sponge). Store in your refrigerator’s crisper drawer where temperatures hover around 35-40°F.
Check seeds every 2 weeks—they should remain moist but not soggy. If condensation forms inside the bag, open it briefly to air out. This cold treatment mimics winter conditions, signaling the seed it’s safe to sprout when warmth returns. Real talk: Skipping this step means waiting months, if germination happens at all.
💧 Step 2: Sow Stratified Seeds in Moisture-Controlled Medium
After stratification, fill 4-inch pots with a mix of 50% peat moss and 50% perlite—this lightweight blend prevents damping-off while allowing roots to breathe. Moisten the mix until it feels like a damp sponge, then sow seeds ¼ inch deep. Hostas are tiny, so I use a toothpick to create small divots for precision planting.
Cover the pots with clear plastic wrap to maintain humidity, but prop one edge up to allow airflow. Place in a bright, indirect light location (like an east-facing windowsill) where temperatures stay between 65-75°F. You’ll see the first true leaves—round, dark green cotyledons—within 4-8 weeks, though some seeds may take twice as long.
☀️ Step 3: Transition Seedlings to Shade and Gradual Sun
Once seedlings develop 2-3 sets of true leaves, remove the plastic wrap and move them to a shaded outdoor spot (like under a tree canopy with dappled light). Hostas despise direct sun at this stage—you’ll spot scorched leaves if you rush them. Harden off over 10-14 days by increasing outdoor time gradually, shielding them from harsh afternoon rays.
After two weeks, you can transplant to their permanent shade spot. Here’s the thing—hostas grow slowly, so don’t expect rapid results. Focus on keeping soil consistently moist (but never waterlogged) and mulching with 2-3 inches of shredded bark to protect roots. You’ll notice new growth in 6-8 weeks, signaling they’ve established properly.
✂️ Step 4: Maintain and Divide for Lush Foliage
Hostas thrive in partial to full shade, so choose a location with 2-4 hours of morning sun at most. Water deeply once weekly (more in extreme heat), aiming for 1 inch of water per week. You’ll know it’s right when the top 2 inches of soil feel damp but not saturated
After 2-3 years, divide mature clumps in early spring or fall to encourage bushier growth. Dig up the plant, separate crowns with 3-5 leaves each, and replant immediately. This ensures your hostas stay vigorous and disease-free. With proper care, your seedlings will mature into 2-3 foot plants within 3-4 years, ready to steal the show in your shade garden.
Tips & tricks for perfect hosta seed germination
Cold-stratification isn't just a step—it's the secret weapon for breaking dormancy and ensuring your hosta seeds wake up ready to grow.
Cold Stratification Precision: The 60-90 day cold period in Step 1 is non-negotiable, but here's the thing—consistency matters more than exact days. Use a small thermometer in your fridge to confirm those 35-40°F temperatures. If your fridge fluctuates, move the bag to a cooler spot (like the bottom shelf) where temps stay steady. I've seen seeds fail when condensation builds up too quickly, so that 2-week moisture check is critical—open the bag if you see water droplets forming.
Medium Mix Mastery: That 50% peat moss and 50% perlite blend in Step 2 is key for preventing damping-off, but don't skip the moisture test. After mixing, squeeze a handful—it should hold together but not drip. Too much moisture creates anaerobic conditions that kill seedlings before they sprout. For extra insurance, add a handful of perlite to the bottom of your pots first to create drainage channels. This lightweight mix also helps prevent those tiny seedlings from getting waterlogged roots.
Light Location Logic: Bright, indirect light is crucial in Step 2, but what does that actually look like? East-facing windows are ideal, but if you don't have one, place your pots near a north-facing window or under fluorescent grow lights 6-12 inches away. Avoid south-facing windows—the intense midday sun can scorch those delicate seedlings before they even develop true leaves. I've had better success with artificial grow lights on a timer (14 hours on/10 hours off) than with weak natural light.
Harden Off Strategically: The 10-14 day hardening process in Step 3 is where most people rush and regret it. Start with just 30 minutes outside on day one, then gradually increase by 30 minutes each day. Watch for wilting—this is your signal to slow down. The goal is to acclimate leaves to outdoor conditions, not shock them. I've seen seedlings completely crisp up when moved too quickly from humidity-controlled pots to harsh afternoon sun. If you're in a hot climate, do this hardening in the early morning or late evening when temperatures are mildest.
Pro Tips for Hosta Seeds Perennial Shade Plant
- Cold-stratification isn't just a step—it's the secret weapon for breaking dormancy and ensuring your hosta seeds wake...
- Cold Stratification Precision: The 60-90 day cold period in Step 1 is non-negotiable, but here's the thing—consistenc...
- Medium Mix Mastery: That 50% peat moss and 50% perlite blend in Step 2 is key for preventing damping-off, but don't s...
Frequently asked questions
Got questions about growing hosta seeds in shady spots? You’re not alone! Here are answers to the most common queries to help you cultivate lush, perennial foliage with confidence.
How long does it take for hosta seeds to germinate?
Patience is key! Hosta seeds typically take 4–12 weeks to germinate, depending on temperature, moisture, and seed freshness. Cold-stratification (chilling seeds) can speed this up. Keep soil consistently moist and avoid direct sunlight until sprouts appear.
Do I need to cold-stratify hosta seeds before planting?
Yes! Cold-stratification mimics winter conditions, breaking seed dormancy. Place seeds in a damp paper towel, seal in a plastic bag, and refrigerate for 4–8 weeks before sowing. This trick boosts germination rates significantly in shady climates.
Can I grow hostas from seed instead of buying plants?
While slower, growing from seed offers greater variety and cost savings. Just know seedlings may take 2–3 years to mature into full-sized plants. For faster results, combine seeds with divisions or nursery starts.
Why aren’t my hosta seeds sprouting? Troubleshooting tips.
Check these common issues:
- Dampness: Overwatering can cause rot; ensure well-draining soil.
- Light: Seeds need indirect light—avoid deep shade.
- Temperature: Ideal germination temps are 60–70°F (15–21°C).
- Freshness: Old seeds (over 1 year) may fail—source new ones!
What’s the best shade-friendly alternative if hostas fail?
Try these low-maintenance perennials for shade:
Plant Why It Works Heuchera (Coral Bells) Vibrant foliage, drought-tolerant. Ferns (e.g., Dryopteris) Lush texture, thrives in damp shade. Astilbe Feathery plumes, loves moisture.
Wrapping up and next steps
Growing hosta seeds for perennial shade plants is a rewarding journey that transforms your garden into a lush, serene oasis—even in cooler climates! 🌿 With patience, the right cold-strategized techniques, and a little care, you’ll soon enjoy vibrant foliage that thrives where others falter.
Now that you’re armed with the best methods and answers to common questions, it’s time to roll up your sleeves and start sowing!
Your next step? Pick your shade spot, prep your soil, and plant those seeds with confidence! Whether you’re a seasoned gardener or a beginner, every hosta leaf you nurture will be a testament to your green thumb. Happy planting! 🌱