
Planting
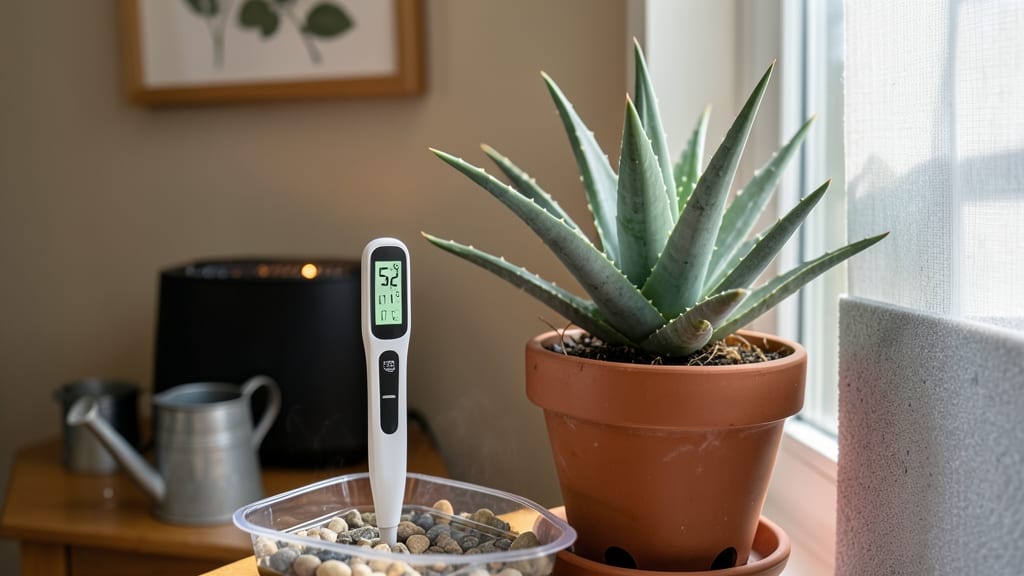
Protecting aloe vera in winter isn't about guesswork—it's about three simple adjustments that keep your plant thriving even when temps drop below 50°F. 🌱 I've lost aloe plants to winter neglect, but these tricks have saved mine for years, including through last year's unexpected late frost.
The key is stopping cold drafts, cutting back on water, and giving it bright light—whether that means moving it indoors or covering it outside. Aloe stores water in its leaves, but winter stress still shows up as mushy bases or yellowing tips if you don't adjust.
My plants now stay plump and green through January with just a few tweaks. You'll end up with a plant that looks just as healthy in winter as it does in summer.
The difference is noticeable within weeks: no brown patches, no leggy growth, just steady, compact foliage ready for spring. Here's exactly how to make it happen.
First, check your zone—aloe tolerates 30-35°F for short periods, but prolonged cold kills it. If you're in Zone 7 or colder, move potted plants indoors near a sunny window or under grow lights.
For in-ground plants, mound extra soil around the base or cover with straw mulch to insulate roots. Water only when the soil is completely dry—overwatering in cold temps is what causes rot.
Light is the secret weapon. Aloe needs 6+ hours of bright light daily, even in winter. If moving indoors, supplement with a LED grow bulb if natural light is weak.
Outside? Choose a sheltered spot where snow won't pile against the leaves. The goal is to mimic its desert origins—dry, bright, and draft-free.
Watch for signs of stress: wrinkled leaves mean it's too dry; soft, translucent spots mean it's too wet. With these adjustments, your aloe will bounce back stronger in spring. The payoff? A plant that survives winter without losing a single leaf—and that's worth the effort.
📚 In This Guide
- What you need
- Instructions
- Tips and common mistakes
- Wrapping up and next steps
What you need
- ● Pot with drainage holes – Ensure it’s 1-2 inches larger than the plant’s root ball (e.g., 6-8 inches in diameter for a mature aloe vera). Terracotta or ceramic pots work best for breathability.
- ● Well-draining potting mix – Use a cactus/succulent mix (or DIY: 60% inorganic grit like perlite/pumice, 30% cactus soil, 10% compost). Avoid garden soil—it retains too much moisture!
- ● Grow lights or full-spectrum LED bulbs – A 12-15W bulb per square foot (or a grow light fixture) to supplement weak winter sunlight.
- ● Insulation materials – Choose one or more: Bubble wrap or frost cloth (for outdoor pots)
- ● Styrofoam cups or pool noodles (to wrap roots)
- ● Mulch (straw, pine needles, or bark chips for ground-level pots)
- ● Watering can with a narrow spout – For precise, bottom-watering (avoid overwatering!).
- ● Pruning shears or sharp scissors – Sterilized with rubbing alcohol to trim dead or damaged leaves.
- ○ Humidity tray or pebble tray – Optional but helpful for indoor setups (fill with gravel + water, not soil).
- ● Thermometer/hygrometer – To monitor temperature (ideal: 50–70°F) and humidity (30–50%).
- ● Plant food (balanced or succulent-specific) – Diluted to half-strength (e.g., 10-10-10 fertilizer). Skip in winter if dormant!
- ● Decorative pot cover or decorative cloth – For a polished look while insulating.
- ● Rooting hormone – If you’re propagating aloe pups during winter.
Step-by-Step instructions for winterizing aloe vera plants
Here's how I've kept my aloe vera thriving through freezing winters—no greenhouse needed.
🪴 Step 1: Move Plants Indoors Before Frost
Watch your local weather forecast and bring aloe vera inside at least 2 weeks before the first frost. These plants can't tolerate temperatures below 40°F—even a brief cold snap will cause irreversible damage. I always move mine to a sunny east- or south-facing window where they'll get 6-8 hours of indirect light daily. If your windows aren't bright enough, supplement with a grow light for 4-6 hours daily to prevent the leaves from stretching and turning pale.
Gently lift the pot by the base to avoid disturbing the roots, and inspect the soil. If it feels dry to the touch, water lightly before moving. The goal is to minimize stress—aloe vera handles transplanting well, but sudden changes shock the plant. Place it in a stable spot where it won't get bumped or jostled, like a kitchen windowsill or a dedicated plant stand.
☀️ Step 2: Adjust Light and Temperature for Indoor Success
During winter, aloe vera needs warmer conditions—keep it in a room where temperatures stay between 60-75°F. Avoid drafty areas like near doors or windows that open frequently, as sudden temperature swings weaken the plant. If you notice the leaves turning yellow or growing soft, that's a sign of cold stress—move it to a warmer spot immediately. I like to place a small space heater nearby (on a low setting) if my home runs cooler at night, but never let it blow directly on the plant.
Rotate the pot a quarter turn every week so the plant grows evenly toward the light. You'll see this in how the leaves fan out—uneven growth means it's leaning toward the window. If the leaves start looking pale or stretched, your plant isn't getting enough light. This is called "etiolation," and it weakens the plant's structure. At this point, I move it closer to the light source or add a grow light for extra support.
💧 Step 3: Reduce Watering to Prevent Root Rot
Winter slows down aloe vera's growth, so it needs far less water than in summer. I check the soil once a week by sticking my finger 1 inch deep—if it feels dry, that's your cue to water. Overwatering is the #1 killer of indoor aloe vera in winter. When you do water, pour just enough to moisten the soil evenly, then let excess drain completely. The pot should feel lightweight after watering, not soggy. I use room-temperature water to avoid shocking the roots, and I always water in the morning so any excess can evaporate by night.
If you notice the leaves puckering or turning brown at the tips, that's a sign of underwatering—but don't overcorrect. Aloe vera stores water in its leaves, so it can handle brief dry spells. The key is consistency: water less frequently but thoroughly when you do. I also avoid getting water on the leaves themselves, as this can cause rot. Water at the base of the plant, and let the soil absorb it before adding more.
✂️ Step 4: Prune Damaged Leaves and Monitor for Pests
Inspect your aloe vera monthly for any leaves that have turned brown, mushy, or developed soft spots—these are signs of rot or pest damage. Use sterilized scissors to trim away any affected leaves at the base, cutting just above a healthy section of the plant. This prevents the issue from spreading to the rest of the aloe vera. I always clean my scissors with rubbing alcohol between cuts to avoid introducing bacteria. After pruning, let the cuts dry out for a day or two before watering again.
Watch for mealybugs or spider mites, which love the dry indoor air of winter. These pests appear as tiny white cottony clusters or fine webbing on the leaves. If you spot them, wipe the leaves down with a soapy water solution (1 tsp mild dish soap per quart of water) using a soft cloth. Repeat every 3-4 days until the pests are gone. I also like to place the pot on a tray of pebbles and water to increase humidity slightly—this helps deter pests while keeping the air around the plant moist enough to discourage mites.
🌱 Step 5: Prepare for Spring Transition
About 4-6 weeks before your last frost date, start acclimating your aloe vera to outdoor conditions. Begin by placing it near a sheltered, shaded spot outside for 1-2 hours the first day. Gradually increase the time it spends outside by 1 hour daily, moving it to brighter light each time. This process, called "hardening off," helps the plant adjust to sun exposure and temperature changes without shock. You'll know it's ready for full sun when the leaves look vibrant green and firm—no more pale or wilted spots.
Before moving it back outside permanently, check the soil one last time. If it feels dry, water it lightly the day before transplanting. When you move it outdoors, place it in a spot with morning sun and afternoon shade for the first week to avoid sunburn. After that, it should thrive in full sun just like in summer. I always fertilize lightly with a balanced, water-soluble fertilizer in early spring to give it a boost after its winter rest.
Tips & tricks for perfect winter aloe vera care
A few simple adjustments can make all the difference when protecting your aloe vera through freezing winters.
Light Source Strategy: In Step 1, when you're placing your aloe vera in a sunny window, aim for the brightest spot you can find—south-facing windows are ideal. If your home lacks natural light, a grow light for 4-6 hours daily becomes essential. I've seen aloe vera leaves stretch dramatically when light is insufficient, so don't wait until you notice pale growth to supplement. The 6-8 hours of indirect light mentioned in Step 1 is non-negotiable for maintaining that vibrant green color and healthy structure.
Temperature Transition: The 40°F threshold in Step 1 is critical—this is where aloe vera starts showing cold stress. I've learned the hard way that even brief exposure below this temperature can cause irreversible damage. If you're in a particularly cold climate, consider moving your aloe vera to a garage or basement that stays above 40°F during extreme cold snaps. The 60-75°F range mentioned in Step 2 is perfect for indoor growth, but consistency matters more than exact numbers—avoid placing it near drafty doors or cold windows.
Watering Wisdom: The once-a-week soil check in Step 3 is your best friend. I use a wooden skewer instead of my finger—it's cleaner and gives me a more precise reading. Remember, aloe vera stores water in its leaves, so the soil can stay dry for longer periods. If you notice the pot feeling heavier than expected after watering, you've likely overwatered. The goal is to keep the pot lightweight after watering, not soggy. This simple check prevents the #1 winter killer of indoor aloe vera—root rot.
Pest Prevention: In Step 4, when monitoring for pests, I've found that adding a tray of pebbles and water beneath the pot creates a natural humid microclimate that deters spider mites. These pests thrive in dry indoor air, so this simple setup can prevent infestations before they start. If you do spot pests, act immediately—the soapy water solution (1 tsp mild dish soap per quart of water) works wonders, but you'll need to repeat treatments every 3-4 days until they're completely gone.
Pro Tips for Protect Aloe Vera Plant In Winter
- A few simple adjustments can make all the difference when protecting your aloe vera through freezing winters.
- Light Source Strategy: In Step 1, when you're placing your aloe vera in a sunny window, aim for the brightest spot yo...
- Temperature Transition: The 40°F threshold in Step 1 is critical—this is where aloe vera starts showing cold stress. ...
Frequently asked questions
Got questions about keeping your aloe vera thriving through winter? You’re not alone! Here are answers to the most common concerns—so you can relax and let your plant do its thing.
Can aloe vera survive outside in winter if I bring it in temporarily?
Yes! If temperatures drop below 30°F (-1°C), move your aloe indoors near a sunny window. Avoid drafty spots like windowsills during cold snaps—aloe prefers stable warmth. Just give it a few days to adjust to indoor light changes to prevent shock.
When is the best time to start winter prep for aloe vera?
Start 4–6 weeks before the first frost in your zone (usually late summer/early fall). This gives your plant time to acclimate to indoor conditions or protective measures like mulching. Pro tip: Monitor local weather forecasts and act before temps dip below 50°F (10°C).
What if my aloe’s leaves turn brown or mushy in winter?
Brown tips? Likely low humidity or overwatering. Mushy leaves? Root rot from soggy soil. Adjust care: water only when the soil is bone-dry (every 3–4 weeks indoors) and use a humidifier nearby. Yellowing? It might need more light—rotate the pot for even exposure.
Can I keep aloe vera in a basement or garage over winter?
Avoid unheated spaces—aloe needs consistent temps above 50°F (10°C). A basement or garage can work only if you add a heat source (like a small space heater) and ensure good airflow. Skip this option if humidity rises above 50%, which encourages rot. Better choices: sunrooms, garages with heat, or indoors near a window.
Are there cold-hardy aloe varieties better for winter survival?
Yes! Aloe arborescens (tree aloe) and Aloe ferox tolerate cooler temps better than tropical varieties. If you’re in Zone 8 or colder, choose these types—or grow aloe in containers and move them indoors. Even hardy aloes need protection when temps drop below 20°F (-7°C).
Wrapping up and next steps
Protecting your aloe vera in winter is all about preparation, patience, and a little extra care—but the effort is totally worth it! 🌱 With the right moves—like moving it indoors, insulating pots, or providing gentle warmth—you’ll keep your plant thriving even when frost is in the air.
Remember, consistency is key, so check on your aloe regularly and adjust as needed.
Now that you’re armed with these cold-hardy survival hacks, why not take the next step? Explore more tips on indoor plant care or share your winter prep wins with fellow plant lovers! Your green thumb is already doing great things—keep it up! ✨