
Planting
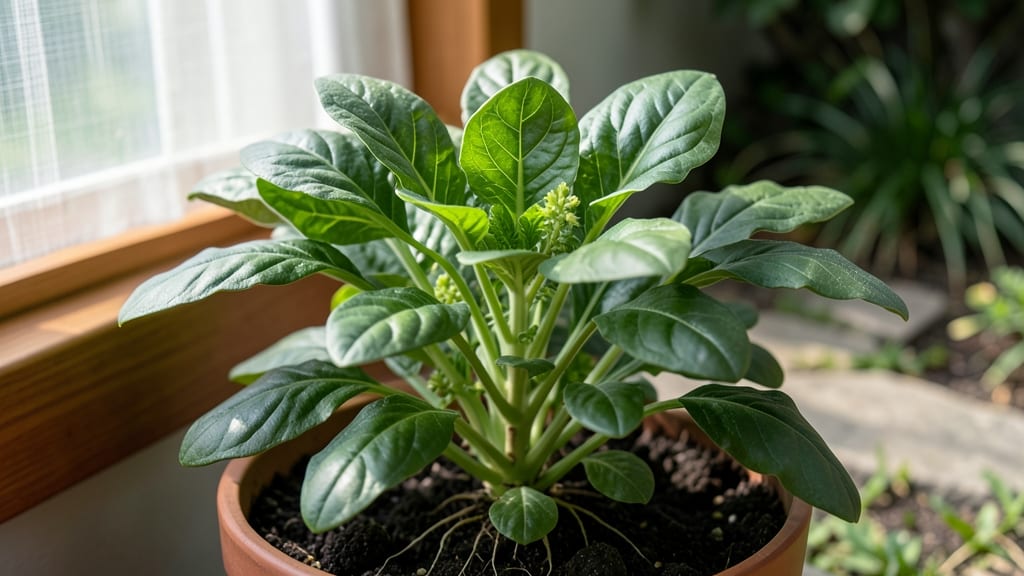
Growing a palak plant in pot turns your balcony or windowsill into a fresh greens factory—no yard required. ✨ I’ve grown spinach in containers for years, and the secret lies in mimicking its natural soil preferences while controlling water and light precisely.
The right pot and soil mix can turn floppy, bitter leaves into vibrant, tender greens in just 30 days.
You’ll need a 5-7 gallon container with drainage, well-draining potting mix, and a spot with 4-6 hours of sunlight daily. Palak hates soggy roots, so water when the top inch feels dry—but never let it bone-dry.
A slow-release fertilizer every 4 weeks keeps those leaves lush and productive. The first harvest comes in 3-4 weeks, and with proper care, you’ll get 3-4 cuts before bolting.
Here’s where most gardeners go wrong: overwatering or crowding plants. Space seedlings 4-6 inches apart and thin to the strongest stems. Yellowing leaves? Check your watering—palak needs consistent moisture, not soggy soil.
And if the center bolts too soon, move the pot to a cooler spot or harvest before seeds form.
This method works for indoor grow lights too—just extend daylight to 12 hours. Whether you’re growing for salads, sautés, or smoothies, you’ll never buy store-bought spinach again. Let’s get those pots planted!
📚 In This Guide
- What you need
- Instructions
- Tips and common mistakes
- Wrapping up and next steps
What you need
- ● Palak (Spinach) Seeds: 1 packet (5–10g, ~50–100 seeds). Choose organic, non-GMO seeds for best results.
- ● Growing Containers: 1–2 5–10 inch (12–25 cm) deep pots (with drainage holes). Terracotta or fabric pots work best.
- ○ Optional: Self-watering planters for consistent moisture.
- ● Potting Mix: 1 bag (5–10 quarts) of well-draining, organic potting soil (avoid garden soil—it compacts!).
- ● Compost/Organic Fertilizer: 1 cup of worm castings or balanced fertilizer (5-5-5 NPK).
- ● Drainage Material: Small pebbles or perlite (½ cup) for the pot’s base.
- ● Hand Trowel (for transplanting seedlings).
- ● Spray Bottle (for gentle watering).
- ○ Mulch (Optional): Straw or shredded leaves (1 inch layer) to retain moisture.
- ○ Grow Lights (Optional): LED lights (12–16 hrs/day) if growing indoors without sunlight.
- ● A sunny spot (6+ hours of direct light daily) or a south-facing window/balcony.
- ● Access to water (palak loves consistent moisture but hates soggy roots!).
- ● Patience! Spinach grows best in cool weather (50–70°F / 10–21°C).
Step-by-step guide to growing palak (spinach) in pots
Here's how to grow vibrant, leafy palak plants in containers—no garden needed.
🪴 Step 1: Choose the Right Pot and Soil Mix
Select a container at least 12 inches deep with drainage holes—palak roots need room to spread without waterlogging. I use terra cotta pots because they breathe and prevent root rot. Fill the bottom with 2 inches of perlite or coarse sand for extra drainage, then add 3 gallons of high-quality potting mix enriched with organic compost. This ensures your spinach gets the nutrients it craves without compacting.
Press the soil down gently but firmly—you want it loose enough for roots to penetrate but stable enough to support the plant. Tap the sides of the pot lightly to eliminate air pockets. The surface should feel slightly damp but not soggy; if it crumbles when squeezed, you're good to go.
🌱 Step 2: Plant Seeds at the Correct Depth and Spacing
Sow 4-5 palak seeds per pot, spacing them 1 inch apart in a loose circle. Plant them ½ inch deep—any deeper and they’ll struggle to reach the surface. I like to use a toothpick to make small holes and drop seeds one by one, then cover lightly with additional soil. This prevents overcrowding and gives each seedling room to grow strong.
Mist the soil gently with a spray bottle until evenly moist. Avoid heavy watering at this stage—it can wash seeds deeper than intended. Place the pot in a warm, shaded spot (around 65-70°F) until germination, which typically takes 7-10 days. You’ll know it’s working when you see tiny green shoots pushing through the soil.
☀️ Step 3: Provide Optimal Light and Watering
Once seedlings emerge, move the pot to a location with 4-6 hours of indirect sunlight daily. Direct sun can scorch young leaves, so a north-facing window or a shaded patio works best. If you’re using artificial light, keep it 12-14 inches away from the plants to avoid burning. Palak thrives in cooler temperatures, so if your space gets too warm, place a fan nearby to create gentle airflow.
Water the soil when the top inch feels dry—about every 2-3 days in warm weather, less frequently in cooler conditions. Let excess water drain completely to prevent root rot. You’ll notice healthy growth when leaves remain deep green and crisp, not yellow or wilted. If leaves start curling, it’s a sign of either too much sun or not enough water.
✂️ Step 4: Harvest and Encourage Continuous Growth
Begin harvesting outer leaves when they reach 3-4 inches long, using clean scissors to snip just above a leaf node. This encourages the plant to produce more leaves instead of bolting (going to seed). I harvest every 2-3 weeks, always leaving the inner leaves intact. Regular harvesting keeps the plant productive for 4-6 weeks before it may need a break or replanting.
After each harvest, fertilize lightly with a balanced liquid fertilizer (diluted to half-strength) to replenish nutrients. Palak is a heavy feeder, so don’t skip this step if you want lush, tender greens. If you notice yellowing between veins, it’s a sign of iron deficiency—sprinkle a bit of iron sulfate into the soil and water thoroughly.
🌿 Step 5: Overwintering and Seasonal Care
Palak is a cool-season crop, so if you’re growing it in warm climates, plant it in early fall or late winter for best results. In colder months, move pots to a protected spot where temperatures stay above 40°F. If frost threatens, cover the pot with a lightweight frost cloth to shield the plant. With proper care, you can enjoy fresh palak for 8-10 weeks before it bolts in warmer weather.
To extend the season, succession plant every 2-3 weeks by sowing new seeds in the same pot after harvesting the first batch. This ensures a steady supply of greens without taking up extra space. Prune any yellow or damaged leaves regularly to keep the plant healthy and encourage new growth.
Tips & tricks for thriving palak in pots
Growing vibrant palak in containers doesn't have to be guesswork—these insights will help you avoid common pitfalls and maximize your harvest.
Container Selection: While terra cotta pots are ideal for their breathability, black plastic pots absorb heat and can dry out soil faster. If using plastic, place a layer of reflective material (like aluminum foil) under the pot to moderate soil temperature. The 12-inch depth requirement is non-negotiable—shallower containers restrict root growth and lead to stunted plants. I've seen palak thrive in window boxes too, just ensure they're at least 10 inches deep.
Germination Environment: The 65-70°F range for germination is critical—below 60°F and seeds may rot, above 75°F and they'll dry out. Create a mini greenhouse effect by covering the pot with clear plastic wrap (secure with rubber bands) during germination. This maintains moisture while allowing light penetration. Remove the cover once sprouts appear to prevent fungal growth. The 7-10 day germination window can vary by seed batch—older seeds may take longer.
Light Management: That 4-6 hours of indirect sunlight is a sweet spot—more than 6 hours can scorch leaves, while less than 4 hours results in leggy, pale growth. For indoor growers, supplement with a full-spectrum LED grow light placed 12-14 inches away for 12 hours daily. Rotate the pot quarter-turn daily to prevent uneven growth toward the light source. Watch for yellowing between veins—this classic sign of iron deficiency often stems from inadequate light exposure during the plant's active growth phase.
Harvesting Technique: When harvesting those 3-4 inch leaves, always cut at a 45-degree angle just above a leaf node using sharp scissors. This angled cut prevents water from pooling on the leaf stub, reducing disease risk. For continuous harvests, I've found that cutting every 2-3 weeks actually extends the plant's productive life by 2-3 weeks compared to waiting until all leaves are mature. The key is maintaining at least 3-4 inner leaves to keep the plant photosynthesizing efficiently.
Pro Tips for Palak Plant In Pot
- Growing vibrant palak in containers doesn't have to be guesswork—these insights will help you avoid common pitfalls a...
- Container Selection: While terra cotta pots are ideal for their breathability, black plastic pots absorb heat and can...
- Germination Environment: The 65-70°F range for germination is critical—below 60°F and seeds may rot, above 75°F and t...
Frequently asked questions
Got questions about growing palak (spinach) in pots? You’re not alone! Here are answers to the most common queries to help you cultivate lush greens—even in tight spaces.
How often should I water my palak plant in a pot?
Water your palak plant when the top inch of soil feels dry. In pots, soil dries out faster than in gardens, so check daily during hot weather. Overwatering is risky—ensure pots have drainage holes to prevent root rot. A light misting in the morning keeps leaves hydrated without soggy soil.
How long does it take for palak to grow in a pot?
Baby leaves (ready for harvest) appear in 3–4 weeks, while full-grown plants take 6–8 weeks. Success depends on sunlight (6+ hours/day), soil richness, and consistent watering. Harvest outer leaves first to encourage regrowth—your pot could keep producing for months!
Can palak survive in hot or cold weather?
Palak thrives in cool temperatures (50–75°F). In heat (above 80°F), leaves bolt (turn bitter) quickly. For summers, grow in partial shade and use a light mulch. In cold (below 40°F), protect pots with frost cloth or move indoors near a sunny window.
What can I do if my palak leaves turn yellow?
Yellow leaves usually mean overwatering, nutrient deficiency, or pests. Check soil moisture first—let it dry slightly between waterings. Feed with compost tea or balanced fertilizer (10-10-10) weekly. Inspect undersides for aphids; spray with neem oil if needed.
Are there alternatives to palak for potted greens?
Yes! Try these low-maintenance pot-friendly greens:
- Baby kale: Hardy, cold-resistant, and packed with nutrients.
- Swiss chard: Vibrant stems, thrives in heat, and regrows after harvest.
- Microgreens (like pea shoots): Fast-growing (7–10 days) and nutrient-dense.
- Arugula: Peppery flavor, grows quickly, and tolerates partial shade.
Wrapping up and next steps
Growing a palak (spinach) plant in a pot is a rewarding way to enjoy fresh, homegrown greens—even in tiny spaces! With the right soil, sunlight, and care, you’ll harvest vibrant leaves in just a few weeks.
Whether you’re a beginner or a seasoned gardener, this method proves that green thumbs aren’t just for big yards.
Ready to dive in? Start small with one pot, experiment with varieties, and soon you’ll be sharing your homegrown palak with friends—or your favorite recipes! 🌱