
Planting
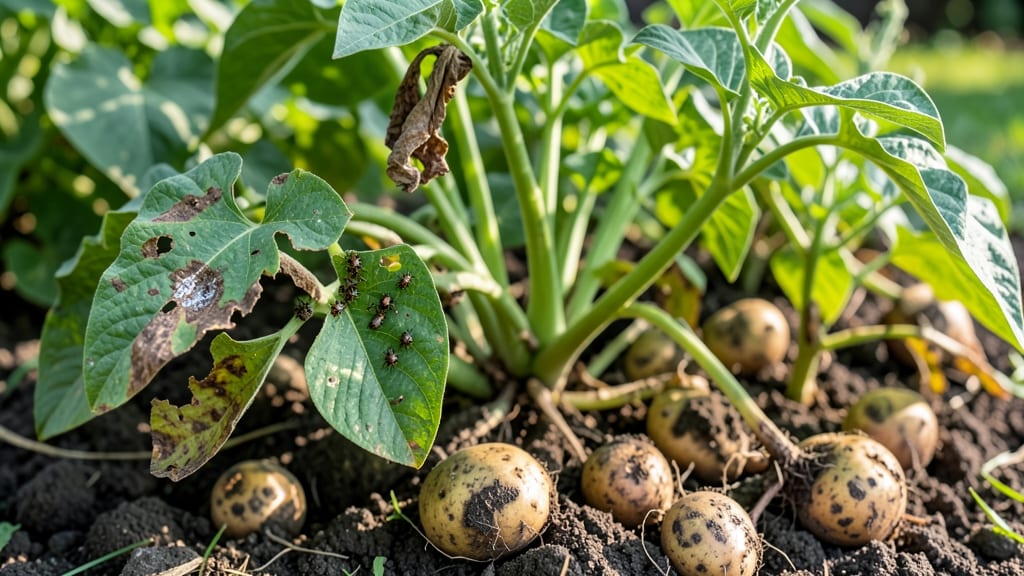
Potato plant problems can turn your harvest into heartbreak—but I’ve saved dozens of crops with these quick fixes. 🌱 The most common issues (wilting, blight, pests) all have simple, organic solutions that work in just days. No expensive sprays or mystery chemicals needed.
Wilting leaves? Often it’s too much water or poor drainage—fix it by loosening soil and watering only when the top inch feels dry. Blight shows up as brown spots?
Yank affected plants immediately and replace them with disease-resistant varieties like ‘Red LaSoda.’ Pests like Colorado potato beetles? Handpick them (yes, really) or spray with neem oil at dusk.
You’ll see results fast: healthier foliage within a week, stronger tubers by harvest time, and a garden that thrives without chemicals. The key is acting early—most problems get worse when ignored. Let’s get your potatoes back on track.
Works for both in-ground and container potatoes, and the fixes scale from a single plant to a full plot. No more wasted harvests—just reliable, organic solutions that actually work.
Root Causes of Potato Plant Struggles
Understanding why your potato plants are underperforming is half the battle—because once you know the real culprits, you can tackle them head-on. Let’s break down the science behind the most common potato plant problems, so you can diagnose and fix them like a pro.
---
Potatoes thrive in well-drained soil, but when they’re sitting in soggy conditions, their roots suffocate. Excess moisture triggers fungal diseases like Phytophthora (a water mold) and Fusarium wilt, which rot the tubers and stems.
Even if your soil feels dry on top, compacted or clay-heavy soil can trap water at the roots, leading to: - Yellowing leaves (chlorosis) from oxygen deprivation. - Blackened or mushy tubers when harvested. - Stunted growth as the plant diverts energy to survival instead of producing potatoes.
Why it happens: - Heavy rainfall or overzealous watering without mulch to absorb excess. - Improper soil prep—amending clay soil with compost or sand can help, but if drainage is still poor, raised beds or containers are a game-changer. - Lack of aeration in tightly packed soil, which prevents roots from breathing.
---
Late blight (Phytophthora infestans) and early blight (Alternaria solani) are the #1 enemies of potato plants, especially in humid climates.
These fungi spread like wildfire, turning leaves into brown, greasy spots that eventually kill the plant. Tubers below ground can also rot if spores hitch a ride from infected foliage.
Why it happens: - High humidity + warm nights (60–80°F) create the perfect fungal buffet. - Poor airflow between plants (crowding or dense foliage) traps moisture, giving spores a foothold. - Contaminated soil or tools from previous infected crops—fungi can survive in soil for years. - Overhead watering splashes spores onto leaves, accelerating spread.
--- From colorado potato beetles to wireworms and aphids, pests don’t just nibble—they destroy tubers, stems, and leaves while transmitting viruses. Wireworms, for example, burrow into tubers, making them unmarketable, while beetles defoliate plants in days.
Why it happens: - Lack of natural predators (like ladybugs or birds) in monoculture gardens. - Over-fertilizing with nitrogen makes plants soft and tasty for pests. - Planting in the same spot yearly lets pest populations build up. - Ignoring early signs (chewed leaves, frass/droppings, or wilting) gives bugs a free pass to multiply.
--- Potatoes are cool-season crops, but extreme heat, frost, or scorching sun can send them into survival mode—fast. Heat stress causes: - Wilting leaves (even with moist soil) as stomata close to conserve water. - Blossom end rot (blackened tips on tubers) from calcium uptake issues. - Sunburnt foliage (white or brown patches) when plants aren’t acclimated.
Why it happens: - Sudden temperature swings (e.g., frost followed by 90°F heat). - Thin mulch or no mulch lets soil temps spike, shocking roots. - Planting too early or too late in the season—potatoes need 50–70°F soil temps to thrive. - Reflective surfaces (like white gravel) or intense afternoon sun without shade can scorch leaves.
--- Potatoes are heavy feeders, and if your soil lacks key nutrients, they’ll show it fast. Yellow leaves? Stunted growth?
Small tubers? These are red flags for deficiencies in: - Nitrogen (N) → Pale green/yellow leaves (but strong stems). - Phosphorus (P) → Purple stems/leaves (struggles to flower and set tubers). - Potassium (K) → Weak stems, brown leaf edges (prone to disease). - Magnesium (Mg) → Yellow patches between leaf veins (like a spiderweb).
Why it happens: - Over-farming without replenishment depletes nutrients faster than they’re replaced. - Soil pH imbalances (potatoes prefer 5.0–6.5; outside this range, nutrients lock up). - Using only synthetic fertilizers without organic matter (compost/manure) to improve soil structure.
--- If you planted potatoes in the same spot year after year, old fungal spores, viruses, or nematodes are still lurking. Rotten tubers, stunted plants, or sudden wilting? Chances are, last season’s problems are back to haunt you.
Why it happens: - Fungal spores (like Verticillium or Rhizoctonia) survive in soil for 2–5 years. - Nematodes (microscopic worms) feed on roots, causing galling (lumpy, deformed roots). - Viral infections (e.g., potato virus Y) spread via contaminated tools, water, or even wind.
--- Pro Tip: 💡 Rotate crops (plant potatoes in a new spot every 3–4 years) and test your soil before planting to catch hidden issues early!
Quick Fixes for Common Potato Plant Issues
When your potato plants start showing signs of distress, acting fast can mean the difference between a thriving harvest and a lost crop. Below are practical, step-by-step solutions for the most common potato plant problems—plus prevention tips to keep your garden healthy long-term.
---
Cause: Overwatering, underwatering, nutrient deficiency, or fungal infections (like early blight).
#### 💧 Step 1: Check the Soil Moisture - Stick your finger 1-2 inches deep into the soil.
If it’s bone-dry, water deeply until moisture reaches 6-8 inches down (but avoid soggy soil). - If the soil is too wet, let it dry out for 2-3 days before watering again.
#### 🍽️ Step 2: Adjust Watering Habits - Water at the base (not overhead) to prevent fungal spores from splashing onto leaves. - Morning watering is best—it gives leaves time to dry before evening humidity sets in.
#### 🌱 Step 3: Boost Nutrients - Yellow lower leaves? Add balanced fertilizer (10-10-10) or compost to replenish nitrogen. - Pale, weak growth? Mix in potassium-rich fertilizer (like banana peel tea) to strengthen roots.
#### 🛡️ Prevention Tips: ✔ Mulch heavily (straw or grass clippings) to retain moisture and prevent soil-borne diseases. ✔ Rotate crops—don’t plant potatoes in the same spot yearly to avoid nutrient depletion.
---
Cause: Late blight (Phytophthora infestans), early blight (Alternaria solani), or soft rot (Erwinia).
#### 🧴 Step 1: Remove Infected Plants Immediately - Pull up and destroy any plants with brown spots, mold, or mushy tubers—don’t compost them! - Sanitize tools with rubbing alcohol between uses.
#### 🌿 Step 2: Apply Organic Fungicides - Copper spray (1 tsp copper sulfate per gallon of water) – spray every 7-10 days for prevention. - Neem oil (1 tbsp per quart of water + soap) – spray early morning or late evening to avoid burning leaves. - Baking soda spray (1 tsp baking soda + 1 tsp oil + 1 quart water) – great for early blight.
#### 🌡️ Step 3: Improve Airflow & Spacing - Thin plants so they’re 12-18 inches apart—crowding traps moisture and spreads disease. - Avoid overhead watering—use drip irrigation instead.
#### 🔥 Prevention Tips: ✔ Plant resistant varieties (e.g., ‘Red LaSoda’ for blight resistance). ✔ Crop rotation—wait 3-4 years before replanting potatoes in the same spot. ✔ Harvest early if blight appears—dig up small tubers before spores spread.
---
Cause: Colorado potato beetles, wireworms, flea beetles, or aphids chewing leaves and tubers.
#### 🔪 Step 1: Handpick & Remove Pests - Colorado potato beetles? Crush eggs (tiny orange clusters on undersides of leaves) and pick off adults daily. - Wireworms? Float-cut potato seeds in saltwater (healthy ones sink; discard floaters).
#### 🌿 Step 2: Use Natural Repellents - Diatomaceous earth – Sprinkle around plants (reapply after rain). - Spinosad spray (organic insecticide) – Effective against beetles and aphids. - Row covers – Use floating fabric early in the season to block beetles.
#### 🍳 Step 3: Trap & Distract Pests - Beer traps – Bury a cup filled with beer near plants; wireworms crawl in and drown. - Interplant with marigolds – Their scent repels beetles and aphids.
#### 🎯 Prevention Tips: ✔ Rotate planting locations to starve out soil-dwelling pests like wireworms. ✔ Plant trap crops (like mustard greens) to lure pests away from potatoes. ✔ Encourage beneficial insects (ladybugs, lacewings) with dill or fennel nearby.
--- Cause: Compacted soil, poor drainage, or lack of sunlight.
#### 🔄 Step 1: Loosen the Soil - Gently rake or fork around roots to aerate without damaging tubers. - Mix in compost or aged manure for better drainage and nutrients.
#### ☀️ Step 2: Ensure Full Sun Exposure - Potatoes need 6+ hours of direct sunlight daily. If shaded, trim nearby plants or relocate if possible.
#### 💪 Step 3: Fertilize for Stronger Growth - Side-dress with compost tea or fish emulsion for a quick nutrient boost. - Avoid high-nitrogen fertilizers late in the season—focus on phosphorus (P) for root development.
#### ✨ Prevention Tips: ✔ Test soil pH (ideal: 5.0-6.5)—amend with lime (to raise pH) or sulfur (to lower it). ✔ Plant in raised beds if your soil is heavy clay or waterlogged.
--- 💡 Harvest at the right time – New potatoes can be dug 2-3 weeks after flowering; mature potatoes when foliage yellows. 🌡️ Store properly – Cure tubers in a cool (40-50°F), dark, humid place for 1-2 weeks before long-term storage. 🚫 Avoid common mistakes – Don’t let plants flower and die back before harvest (this weakens tubers).
With these quick fixes and prevention strategies, your potato plants should bounce back—and you’ll be on your way to a bountiful, pest-free harvest! 🥔✨
Frequently asked questions
Why are my potato leaves turning yellow?
Yellowing potato leaves usually mean overwatering, nutrient deficiency, or early blight. Check soil moisture first—it should feel damp but not soggy. If the yellowing starts at the bottom, it’s often nitrogen deficiency (add compost). For brown spots with yellow halos, you’re dealing with early blight—remove affected plants immediately and apply copper spray.
What do brown spots on potato leaves mean?
Brown spots with greasy-looking edges are classic signs of late blight, while dry, concentric rings indicate early blight. Both spread fast in humid weather. Act immediately: Pull up infected plants (don’t compost them), thin your crop for better airflow, and spray with neem oil or baking soda solution. Resistant varieties like ‘Red LaSoda’ can help next season.
How do I get rid of Colorado potato beetles?
Handpick adults and crush their orange eggs (found on leaf undersides)—this is the fastest method! For larger infestations, spray with spinosad or neem oil at dusk. Prevent future problems by using row covers early in the season or planting trap crops like mustard greens to lure them away from your potatoes.
My potato tubers are rotting before harvest—what’s wrong?
Rotting tubers usually mean too much moisture or fungal infection from blight. Improve drainage by adding compost or planting in raised beds. If blight is present, harvest any salvageable small tubers immediately and destroy infected plants. For next season, choose blight-resistant varieties and avoid overhead watering.
Can I still harvest potatoes if the foliage dies?
Yes! If the leaves yellow and die back naturally (not from disease), your tubers are likely ready. Wait 2-3 weeks after flowering for new potatoes, or harvest when foliage fully dies for mature potatoes. Dig carefully—don’t let tubers sit exposed to light (they’ll turn green and bitter). Cure them in a dark, humid place for 1-2 weeks before storage.