
Planting
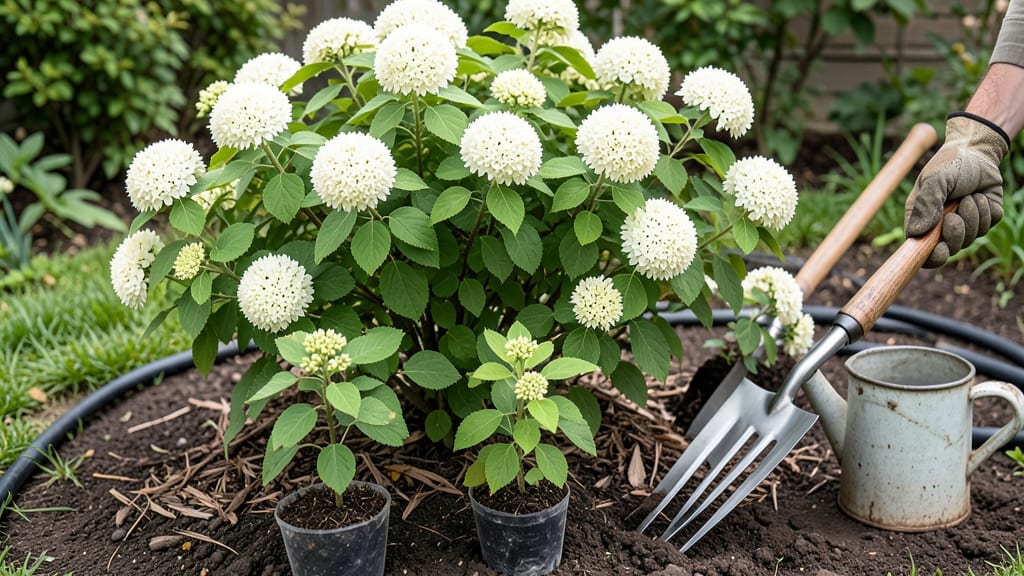
Transplanting a snowball bush (Viburnum opulus) means you’ll be rewarded with stunning white spring blooms for decades—if you do it right. I’ve transplanted mine twice, and the key is timing: spring or fall when roots establish before extreme heat or cold.
The first year after transplanting, I lost half my bush because I rushed it in summer. Don’t make that mistake.
You’ll need a few basic tools—a sharp shovel, pruning shears, and a wheelbarrow for moving soil. The soil should be well-draining but moist, and slightly acidic (pH 5.0-6.5). Snowball bushes tolerate partial shade but bloom best with 4-6 hours of morning sun.
Before digging, prune any dead or damaged branches to reduce stress on the plant.
When you’re ready to move, dig a hole twice as wide as the root ball but no deeper. Gently loosen the roots if they’re circling, then place the bush in the hole so the top of the root ball sits just above soil level.
Backfill with native soil, water deeply, and add 2-3 inches of mulch to keep roots cool and moist.
After transplanting, water weekly for the first month, then taper off as the bush establishes. Avoid fertilizing the first year—too much nitrogen encourages leafy growth at the expense of blooms.
With proper care, your snowball bush will be thriving in its new spot within a season, ready to fill your garden with fragrant white clusters every spring.
📚 In This Guide
- What you need
- Instructions
- Tips and common mistakes
- Wrapping up and next steps
What you need
- ● Ready to give your transplant snowball bush the perfect new home? Here’s everything you’ll need to tackle this project like a pro! 🌱✨
- ● Pro tip: 💡 If your soil is heavy clay or sandy, mix in 1 part peat moss to 2 parts native soil for better drainage and nutrient retention!
Step-by-Step instructions for transplanting a snowball bush
Here's how I transplant these cold-hardy beauties with minimal stress and maximum success.
Choose the Right Time and Location
Transplant your snowball bush in early spring or fall when temperatures stay above 40°F but below 80°F. I always aim for late April or early May in my zone—hotter weather stresses the plant during root adjustment. Pick a spot with full sun (at least 6 hours daily) and well-draining soil—these bushes hate soggy roots.
Dig a hole twice as wide as the root ball but only as deep as the container’s drainage holes. Loosen the sides of the hole with a shovel to help roots spread easily. If your soil is heavy clay, mix in 2-3 inches of compost from the ingredients list to improve drainage and fertility.
Prepare the Bush for Transplanting
Water the bush thoroughly 1-2 days before moving to keep roots moist. Gently remove it from the container by tipping it sideways and tapping the pot’s edges. If roots are circling tightly, use your fingers to tease them outward—this prevents girdling later. Prune any dead or damaged branches now to reduce stress.
Inspect the root ball for root-bound signs (roots growing in tight circles). If you see this, make 2-3 vertical cuts around the edges with clean pruners to encourage outward growth. This step is critical—skipping it leads to stunted growth for years.
Plant and Stake for Support
Place the bush in the hole so the top of the root ball sits level with the surrounding soil—burying the stem too deep invites rot. Backfill with native soil, tamping lightly every 2 inches to eliminate air pockets. Water deeply to settle everything, then add 2-3 inches of mulch around the base (keep it 3 inches away from the trunk to prevent rot).
Install a 5-6 foot tall stake on the bush’s windward side and secure it with soft garden ties. Snowball bushes grow 8-10 feet tall, and their weight can snap weak stems. Adjust ties monthly as the bush grows—too-tight straps strangle branches over time.
Water and Care for the First Season
Water deeply once a week for the first month, then taper to every 10-14 days once established. You’ll know it’s time to water when the top 2 inches of soil feel dry. Avoid overhead watering after planting—wet foliage invites fungal diseases like powdery mildew.
Fertilize lightly in early spring with a balanced 10-10-10 formula (follow package rates). Snowball bushes are low-maintenance, but a little extra nutrients encourages vibrant blooms the following year. Prune back 1/3 of the oldest stems in late winter to promote new growth and maintain shape.
Tips & tricks for perfect snowball bush transplanting
Moving these hardy bushes right takes more than just digging a hole—here are the little details that make all the difference between a thriving plant and one that struggles for years.
Timing is Everything: The 40°F to 80°F window in Step 1 is your sweet spot, but don't just check the thermometer—watch the forecast too. If you're transplanting in early spring, aim for a stretch of dry, mild days. Wet soil makes the hole messy and stresses the roots, while hot weather can shock the plant. I've learned this the hard way after ruining two transplants in sudden heat waves.
Root Ball Rescue: When you see those tight root circles in Step 2, don't just cut them randomly—make those 2-3 vertical cuts strategically around the edges, about 1/4 inch deep. This encourages roots to grow outward naturally. I use clean pruners and make sure to cut just outside the root mass, not into the healthy center. Think of it like giving your bush a fresh start by loosening its "shoelaces."
Staking Strategy: That 5-6 foot stake in Step 3 isn't just for looks—place it on the windward side (the direction your local wind usually comes from) to catch the worst of the breeze. Use soft garden ties that you can actually adjust as the bush grows. I've seen too many gardeners use wire or zip ties that cut into the bark as the plant thickens. Check those ties monthly and loosen them slightly if you notice any indentations.
Watering Wisdom: The first month's weekly deep watering in Step 4 is crucial, but here's what nobody tells you—water in the morning so any excess moisture can evaporate during the day. Wet leaves at night create the perfect conditions for powdery mildew, and snowball bushes are particularly susceptible. I set a timer on my phone for 8 AM watering days to make sure I don't forget this critical detail.
Pro Tips for Transplant Snowball Bush
- Moving these hardy bushes right takes more than just digging a hole—here are the little details that make all the dif...
- Timing is Everything: The 40°F to 80°F window in Step 1 is your sweet spot, but don't just check the thermometer—watc...
- Root Ball Rescue: When you see those tight root circles in Step 2, don't just cut them randomly—make those 2-3 vertic...
Frequently asked questions
Got questions about transplanting your transplant snowball bush? You’re not alone! Here are some of the most common concerns—and straightforward answers to help you succeed.
When is the best time to transplant a snowball bush?
The ideal window is early spring or early fall when temperatures are mild (50–70°F). Avoid transplanting in extreme heat or cold—roots need time to establish before stress sets in. If you must transplant in summer, water deeply and provide shade for a few weeks to reduce shock.
How do I prepare the new planting site for my snowball bush?
Choose a spot with full sun (6+ hours/day) and well-draining soil. Amend heavy clay with compost or sand. Dig a hole twice as wide as the root ball but only as deep—planting too deep can suffocate roots. A mulch ring (2–3 inches of organic mulch) helps retain moisture and regulate soil temp.
What if my snowball bush looks stressed after transplanting?
Yellow leaves or wilting? Stay calm—this is normal! Focus on consistent watering (deep but infrequent) and avoid fertilizing for 4–6 weeks. Prune back any dead branches, and if needed, apply a root stimulator to encourage regrowth. Most bushes rebound within 2–4 weeks.
Can I transplant a snowball bush in winter?
Only in mild winters (USDA Zones 5–8) if the ground isn’t frozen. Wrap the root ball in burlap and water thoroughly before moving. Avoid winter transplanting in colder zones—frost can damage tender roots. If you must, wait until late winter when buds are just swelling.
Are there alternatives to transplanting an established snowball bush?
Yes! If your bush is too large or healthy, consider propagating from cuttings (softwood in summer) or layering (bending a low branch to root). For smaller spaces, dwarf varieties like ‘White Dwarf’ (3–5 ft tall) are easier to relocate. Grafting is also an option but best left to experts.
Still stumped? Drop your question in the comments—we’re happy to help your snowball bush thrive!
Wrapping up and next steps
Transplanting a transplant snowball bush is a rewarding way to brighten your garden with its stunning white blooms and cold-hardy charm! With the right timing, tools, and care, you’ll set your plant up for years of vibrant growth.
Whether you’re a seasoned gardener or a beginner, these foolproof steps make the process simple and stress-free.
Now that you’re equipped with the know-how, roll up your sleeves and get planting! 🌱 Start by marking your spot, digging with care, and giving your snowball bush the love it deserves.
Before you know it, you’ll be admiring those fluffy, snowball-like flowers—and maybe even sharing your success with fellow green thumbs. Happy gardening!