
Planting
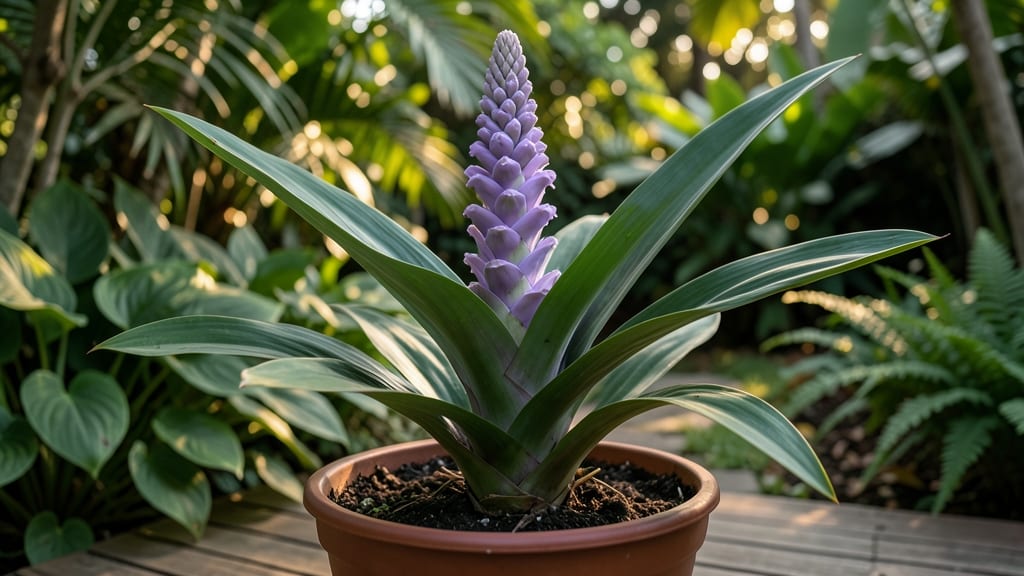
Growing the awapuhi shampoo ginger plant means your patio will smell like a tropical paradise. 🌿 This fragrant perennial thrives in containers, making it perfect for sunny spots where you can snip fresh leaves for natural shampoo or tea—no yard required.
The secret to success is mimicking its native Hawaiian habitat: bright, indirect light, well-draining soil, and consistent moisture. I’ve grown mine in a 12-inch pot on my balcony all summer, and it’s still going strong after three years.
Just avoid soggy soil, and you’ll get lush, glossy leaves that smell like citrus and ginger.
You’ll start harvesting leaves in just 3-4 months, and the plant keeps producing all season. The more you cut, the bushier it grows—perfect for continuous use. Even in cooler climates, a sunny windowsill or grow light keeps it happy indoors.
Works in zones 9-11 outdoors, or as a houseplant anywhere. Here’s how to keep yours thriving year-round!
📚 In This Guide
- What you need
- Instructions
- Tips and common mistakes
- Wrapping up and next steps
What you need
- ● Awapuhi shampoo ginger plant: 1 healthy rhizome (or a small potted plant from a nursery). Look for firm, plump rhizomes with visible buds.
- ● Well-draining potting mix: 5–10 gallons, depending on pot size. A blend of cactus/succulent mix (60%) and perlite or pumice (40%) works best.
- ● Container: 1–2 large pots (12–18 inches in diameter) with drainage holes. Terracotta or fabric pots are ideal.
- ● Slow-release fertilizer: 1 packet of balanced organic fertilizer (e.g., 5-5-5 or 3-4-6 ratio) for tropical plants.
- ○ Peat moss or coconut coir: 1–2 cups (optional, for extra moisture retention if your climate is dry).
- ● Gloves: 1 pair (gardening gloves to protect your hands from sharp rhizome edges).
- ● Trowel or small shovel: 1 for digging and planting.
- ● Watering can or hose with a gentle spray nozzle: 1 to avoid overwatering.
- ○ Mulch (optional): Pine bark or shredded leaves (1–2 inches) to retain moisture and regulate soil temperature.
- ● Sunlight spot: A location with bright, indirect light (6+ hours of sun daily) or a grow light if indoors.
- ● Patience! 😉 Awapuhi plants grow slowly but reward you with vibrant growth and fragrant blooms over time.
Step-by-step guide to growing awapuhi shampoo ginger plant in containers
This fragrant perennial thrives when you nail light, soil, and spacing—here's how to grow it successfully in pots.
🌱 Step 1: Select the Right Container and Planting Location
Choose a container with drainage holes that's at least 12 inches wide and deep—awapuhi needs room to spread its rhizomes. Terra cotta works best because it breathes and prevents root rot. Place your pot in a location receiving full sun to partial shade (6+ hours of sunlight daily). Too much shade reduces fragrance intensity while too much direct sun can scorch leaves in hot climates.
If you're planting multiple plants, space containers 18-24 inches apart to allow airflow and prevent fungal diseases. I always position mine near seating areas or walkways so the fragrance can be enjoyed while walking by. The plant's glossy leaves and citrusy aroma make it a natural air freshener when placed correctly.
🪴 Step 2: Prepare Well-Draining Soil Mix
Use a blend of 50% premium potting mix and 50% perlite or coarse sand to create a loose, well-draining medium. Awapuhi hates soggy roots, so the extra grit prevents waterlogging. Fill your container to about 2 inches below the rim to allow room for watering.
Before planting, moisten the mix until it's damp but not saturated—you should be able to squeeze a handful and see a few drops of water, not a steady stream. This pre-moistening helps establish roots quickly without shocking the plant. I always add a handful of worm castings to the mix for extra nutrients, which helps the plant develop its signature fragrance faster.
🌿 Step 3: Plant Rhizomes Properly for Optimal Growth
Place the awapuhi rhizome horizontally in the soil, partially uncovered—about 1/3 of the rhizome should be above soil level. This encourages new shoots to emerge from the exposed sections. Cover the rest with soil and press lightly to ensure good contact. The rhizome's natural growth pattern means it won't need deep planting like bulbs.
Water immediately after planting to settle the soil around the rhizome. You'll know it's properly hydrated when the surface looks evenly moist but not muddy. Avoid overwatering at this stage—awapuhi rhizomes can rot if they sit in wet soil for too long. Within 2-4 weeks, you should see new shoots emerging from the exposed portions of the rhizome.
☀️ Step 4: Maintain Consistent Light and Watering
Keep your awapuhi in bright, indirect light for the first two weeks to help it establish without stress. After that, gradually introduce it to more direct sunlight. Water when the top 1-2 inches of soil feel dry, which typically means watering every 5-7 days depending on your climate. Overwatering is the biggest mistake—yellowing leaves usually signal too much moisture.
During the growing season, feed with a balanced liquid fertilizer (10-10-10) every 4-6 weeks to encourage lush foliage and strong fragrance. I always fertilize in the morning so any excess nutrients have time to absorb before evening. The plant's natural resistance to pests means you rarely need to intervene, but watch for spider mites if the air gets too dry.
✂️ Step 5: Prune and Divide for Long-Term Health
Trim back any brown or yellow leaves as they appear to maintain the plant's appearance and encourage new growth. In late winter or early spring, divide mature clumps every 2-3 years to prevent overcrowding. Simply lift the rhizome, separate the sections with a clean knife, and replant each portion in fresh soil. This rejuvenates the plant and gives you extra plants to share.
Awapuhi thrives when you let it spread naturally, but don't let it become root-bound. If you notice roots circling the pot or growth slowing, it's time to repot into a slightly larger container. The plant's natural hardiness means it handles pruning well—just avoid cutting into the rhizome itself, as this can harm the plant's ability to regenerate.
Tips & tricks for perfect awapuhi shampoo ginger plant growth
Here's what nobody tells you about growing this fragrant beauty—these little details make all the difference between a struggling plant and a thriving one.
Container Selection: While terra cotta is ideal, plastic pots work too if you drill drainage holes yourself. I've successfully grown awapuhi in glazed ceramic containers by adding a layer of pebbles at the bottom—just ensure proper drainage. The key is the 12-inch minimum size; smaller pots restrict rhizome growth and reduce fragrance intensity.
Soil Science: That 50/50 mix of potting soil and perlite/sand isn't just arbitrary—it creates the perfect air-to-moisture balance awapuhi craves. For extra fragrance boost, mix in 10% coconut coir instead of perlite; it retains moisture better while still preventing compaction. The worm castings aren't optional either—they contain beneficial microbes that help develop that signature citrusy aroma.
Rhizome Placement Secret: When planting, place the rhizome with the "eyes" (buds) facing upward—this is where new shoots will emerge. I like to make a shallow trench about 1 inch deep, lay the rhizome in, then cover just enough to hold it in place. The exposed portion should look like a natural landscape, not buried treasure. This technique ensures you'll see those first shoots in just 2-4 weeks.
Light Transition Strategy: The two-week bright indirect light phase is crucial for preventing transplant shock. I recommend placing your new plant near an east-facing window first, then gradually move it toward south-facing light over 5-7 days. This mimics natural sun progression and helps the plant adjust without leaf scorch. Watch for leaves that lean toward the light—this is your plant telling you it needs to turn!
Pro Tips for Awapuhi Shampoo Ginger Plant
- Here's what nobody tells you about growing this fragrant beauty—these little details make all the difference between ...
- Container Selection: While terra cotta is ideal, plastic pots work too if you drill drainage holes yourself. I've suc...
- Soil Science: That 50/50 mix of potting soil and perlite/sand isn't just arbitrary—it creates the perfect air-to-mois...
Frequently asked questions
Got questions about growing awapuhi shampoo ginger (Zingiber zerumbet) in sunlit pots? We’ve got answers!
Here are some of the most common queries—plus quick solutions to keep your fragrant plant thriving.
Can awapuhi shampoo ginger grow in full sun or does it need shade?
This tropical beauty loves bright, indirect light but can tolerate morning sun in hotter climates. Avoid harsh afternoon rays, which can scorch its broad leaves. If growing indoors, place it near a south- or west-facing window for optimal growth. Pro tip: Rotate pots occasionally for even exposure!
How often should I water my awapuhi shampoo ginger plant?
Water when the top 1–2 inches of soil feel dry—typically every 5–7 days in warm weather. Overwatering is the #1 killer! Ensure pots have drainage holes to prevent root rot. Yellowing leaves? You’re likely overdoing it. Reduce frequency in cooler months when growth slows.
Why isn’t my awapuhi shampoo ginger flowering?
Patience is key—these plants often take 2–3 years to bloom indoors! Ensure it gets bright light, warmth (65–80°F), and well-draining soil. If mature but still no flowers, try fertilizing lightly with a balanced liquid fertilizer (diluted to half-strength) in spring/summer. Bonus: Some varieties bloom more reliably in containers!
How do I propagate awapuhi shampoo ginger from cuttings?
Snip a healthy pseudostem (the thick, leafy stalk) at the base with clean scissors. Remove lower leaves, let it callous for 1–2 days, then plant in moist potting mix. Keep warm and humid (a plastic bag over the pot helps!). Roots should form in 4–6 weeks. Warning: Wear gloves—sap can irritate skin!
What’s the best potting mix for awapuhi shampoo ginger?
Use a lightweight, airy mix like:
- 60% peat moss or coco coir (for moisture retention)
- 30% perlite or orchid bark (for drainage)
- 10% worm castings or compost (for nutrients)
Wrapping up and next steps
Ready to bring the tropical charm of the awapuhi shampoo ginger plant into your space?
This fragrant perennial is a breeze to grow—just grab a sunny spot, a well-draining pot, and a little TLC. 🌿 With its aromatic leaves and low-maintenance nature, it’s the perfect addition for gardeners and DIY enthusiasts alike.
Now that you’re armed with tips and answers, take the next step—plant yours today and enjoy the soothing scent and lush greenery for years to come! 🌞