
Planting
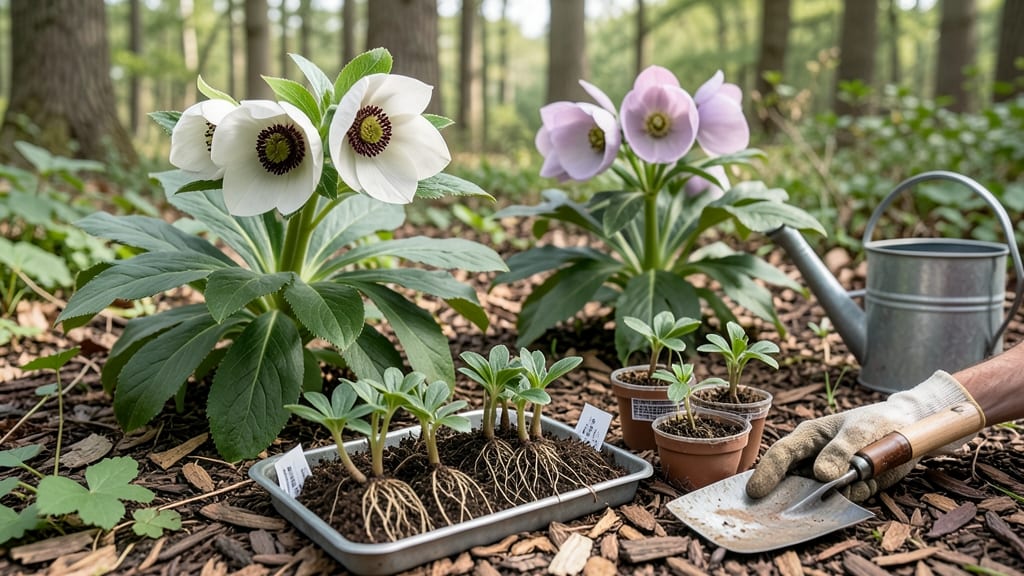
Planting hellebores at the best time ensures vibrant blooms and strong roots, and the answer depends on your climate and patience for waiting.
Picture this: you’ve just added these shade-loving perennials to your garden, only to watch them struggle because you planted them too late in spring or too early in fall. Hellebores 🌸 thrive when given the right conditions, and timing is everything—whether you’re in USDA Zone 6a or beyond.
Fall planting (September–October) gives roots time to establish before winter, while early spring (March–April) lets them take advantage of cooler temperatures. Both approaches work, but each has its own benefits and challenges depending on your local frost dates.
In this guide, I’ll walk you through the ideal planting windows, soil prep tips, and how to care for your hellebores so they reward you with year-round blooms for seasons to come.

Fall planting vs. early spring: which gives hellebores the best start?
Deciding whether to plant helleborines in fall or early spring can feel like a high-stakes gardening puzzle. These shade-loving beauties thrive when given the right conditions, but timing directly impacts their root establishment and bloom timing.
In colder USDA zones 3–7, fall planting often offers a head start, while milder zones 8–9 may favor spring. Let’s break down the pros and cons of each approach to help you make the best choice for your climate.
Fall planting allows helleborines to establish roots before winter dormancy, giving them a stronger foundation for spring growth. However, planting too late risks exposing young roots to freezing temperatures.
Early spring plantings, on the other hand, avoid winter stress but may struggle with competition from weeds and slower initial root development. The ideal window often depends on your local frost dates and soil conditions.
Comparison Table: Fall vs. Early Spring Planting for Hellebores
| Factor | Fall Planting (Sept–Oct) | Early Spring Planting (March–April) |
|---|---|---|
| Root Establishment | Strong, 6–8 weeks before dormancy | Slower, 4–6 weeks before active growth |
| Bloom Timing | Earlier blooms next season | Blooms 1–2 weeks later |
| Climate Suitability | Best for zones 3–7, avoid late frosts | Ideal for zones 8–9, milder winters |
| Weed Competition | Lower risk (cooler temps) | Higher risk (spring weeds emerge early) |
| Watering Needs | Moderate (soil stays moist) | Higher (spring droughts possible) |
| Best For | Cold climates, early-season blooms | Mild climates, flexible timing |
In USDA zones 3–6, fall planting is often the winner because it allows helleborines to develop roots before winter. Aim to plant 6–8 weeks before the first frost, typically in September or early October.
This gives them time to anchor before the ground freezes. For example, in zone 5, planting in early September ensures roots establish before November frosts.
Meanwhile, zones 8–9 benefit from early spring plantings because mild winters reduce frost risk. Plant in March or early April, just as soil begins to warm. This avoids the heat stress of summer planting while still allowing roots to grow before summer dormancy.
In zone 9, for instance, spring plantings in March yield vibrant blooms by winter.
Another key factor is bloom timing. Fall-planted hellebores often produce earlier flowers the following season, while spring-planted varieties may bloom slightly later. If you’re eager to see those winter or early spring blooms, fall planting is your best bet.
However, if you’re in a warmer climate where winters are mild, spring planting can still deliver stunning results with minimal risk.
Regardless of timing, soil preparation is critical. Hellebores thrive in well-draining, slightly acidic soil (pH 6.0–7.0) with organic matter. Amend heavy clay with compost or sand, and avoid soggy soil, which can rot roots.
Mulching with 2–3 inches of organic mulch after planting helps retain moisture and regulate soil temperature.
One common mistake is planting too deeply or shallowly. Hellebores should sit just below soil level, with the crown 1–2 inches deep. Planting too deep can suffocate roots, while shallow planting exposes them to temperature fluctuations.
Always water thoroughly after planting to eliminate air pockets and encourage root contact with soil.
For gardeners in transition zones (7–8), timing becomes a bit trickier. If you’re in zone 7, you can plant in late fall (November) or early spring, but avoid planting when soil temperatures drop below 40°F.
Use a light mulch to protect young plants from sudden cold snaps. In zone 8, spring planting is safer, but you can also try fall plantings in October if winters are mild.
Ultimately, the best time to plant helleborines depends on your local climate and personal goals. For earlier blooms and stronger establishment, fall planting is ideal in cooler zones. For flexibility and reduced risk, early spring works well in milder areas.
Whichever you choose, prioritize well-prepared soil and consistent moisture to set your hellebores up for years of stunning, long-lasting blooms. 🌸
How to prepare soil and plant hellebores for maximum success
Planting helleborus (commonly called hellebores) successfully starts with well-prepared soil and proper technique. These shade-loving perennials thrive in moist, humus-rich soil with excellent drainage, so amending your garden bed before planting is key.
Whether you're planting in fall or early spring, following these steps ensures your hellebores establish strong roots and reward you with vibrant winter or spring blooms.
Hellebores prefer a slightly acidic to neutral soil pH (6.0–7.0) and benefit from organic matter like compost or aged manure. Avoid heavy clay soils, which can suffocate roots and lead to rot or fungal diseases.
If your soil drains poorly, mix in sand or perlite to improve aeration while retaining moisture. The right soil prep sets the stage for healthy growth and long-lasting flowers.
Step-by-Step Planting Guide for Hellebores
-
Step 1: Choose the Right Location
Select a spot with partial shade (2–4 hours of morning sun) and protection from hot afternoon rays. East-facing beds or dappled shade under trees work well.
-
Step 2: Test and Amend Soil
Test soil pH and amend with compost or peat moss to improve fertility. For heavy clay, mix in 1 part sand to 3 parts soil to enhance drainage.
-
Step 3: Dig the Hole
Dig a hole twice as wide as the root ball but only 1–2 inches deeper than the container’s base. Loosen roots if pot-bound before planting.
-
Step 4: Plant at the Right Depth
Place the plant so the top of the root ball sits level with or slightly above soil. Burying too deep can cause stem rot.
-
Step 5: Space Properly
Space plants 12–18 inches apart for dwarf varieties and 18–24 inches apart for standard types. This prevents overcrowding and improves airflow.
-
Step 6: Water Thoroughly
Water deeply after planting to settle soil and remove air pockets. Keep soil consistently moist (not soggy) for the first 4–6 weeks.
-
Step 7: Mulch for Protection
Apply a 2–3 inch layer of mulch (shredded bark or leaves) to retain moisture, suppress weeds, and protect roots from temperature swings.
Pro Tip: For fall plantings, water weekly until frost. For spring plantings, avoid fertilizing until new growth appears in early spring.
After planting, monitor your hellebores for signs of stress or disease, such as yellowing leaves (often from overwatering) or black spots (fungal issues). If you notice poor drainage, amend the soil with more organic matter or create a raised bed.
Hellebores are generally low-maintenance once established, but consistent moisture and partial shade are non-negotiable for their long-term success.
One common mistake gardeners make is planting too deeply, which can suffocate the crown and lead to rot. Always ensure the root flare (where roots meet the stem) is visible above soil level.
Another pitfall is over-fertilizing, which encourages leafy growth at the expense of blooms. A light application of balanced fertilizer (5-10-10) in early spring is sufficient for most varieties.
With the right soil prep and planting technique, your hellebores will thrive and reward you with months of color, often blooming from late winter through spring.
Whether you plant in fall or early spring, these steps ensure your hellebores get the best possible start for a lifetime of beauty in your garden.