
Planting
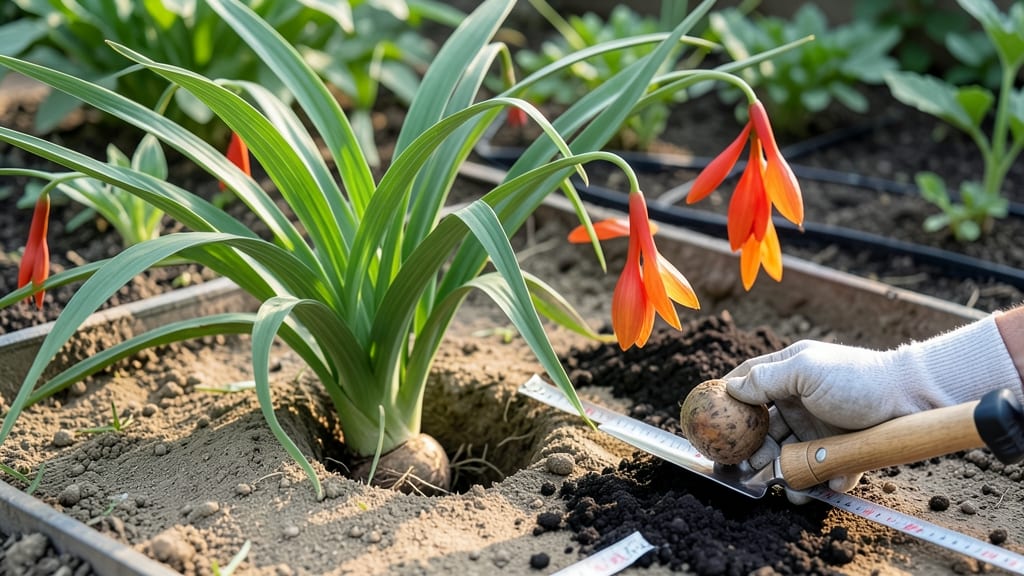
Planting crocosmia bulbs at 2–3 inches deep 🌸 unlocks their full potential, ensuring those dramatic arching blooms light up your garden from midsummer through fall.
If you’ve ever planted crocosmia only to see sparse or weak growth, the issue might be buried deeper than you think. Too shallow, and the bulbs dry out; too deep, and they struggle to push through the soil.
The right depth isn’t just about inches—it’s about timing, soil, and even your local climate.
Below, I’ll break down the exact planting depth for your region, how to adjust for sandy vs. heavy soil, and the 3-step method to guarantee your crocosmia thrives year after year. No more guessing—just vibrant, reliable blooms.
You’ll also discover how to space them for maximum impact, when to fertilize for bold foliage, and the one post-planting trick that keeps pests away. Ready to transform your garden?

Optimal crocosmia bulb planting depth by soil type and climate
Getting your crocosmia bulbs planted at the right depth is the foundation for those show-stopping fall blooms you’re dreaming of. These striking plants—especially varieties like 'Lucifer' and 'Emily McKenzie'—thrive when their corms are nestled just right in the soil. But here’s the catch: the perfect planting depth isn’t one-size-fits-all.
It depends on your soil type, climate zone, and even the size of your bulbs. Let’s dig into the details so you can plant with confidence and watch your garden transform.
First, let’s talk about why depth matters. Crocosmia corms need to be planted neither too shallow nor too deep. If they’re too shallow, they may dry out or get baked by the sun.
If they’re too deep, they’ll struggle to push through the soil, leading to weak stems or no blooms at all. The general rule is to plant them at a depth equal to 2-3 times the height of the corm, but this varies based on your garden’s conditions.
For example, sandy soil drains faster, while clay soil holds moisture longer, both of which affect how deep you should plant.
🌱 Did You Know? Crocosmia corms are actually modified stems, not true bulbs, which means they store nutrients differently. This makes proper depth even more critical for their survival and bloom potential.
Now, let’s talk about how climate zones play into your planting strategy. If you live in warmer climates (Zones 9-10), you’ll want to plant your crocosmia corms a bit deeper—around 3-4 inches—to protect them from the intense heat and prevent them from drying out.
In contrast, gardeners in cooler zones (6 or below) can plant slightly shallower, around 2 inches, to help the corms establish quickly before winter sets in.
For larger corms (2-3 inches in diameter), like those of the 'Lucifer' variety, aim for a planting depth of 3-4 inches. These bigger corms have more stored energy and can handle deeper planting, which also helps anchor the taller stems that produce those dramatic arching blooms.
Smaller corms, often found in 'Emily McKenzie', should go in at 2-3 inches deep to encourage robust growth without overwhelming them.
One pro tip: always plant your crocosmia corms with the pointy end up. This isn’t just a random rule—it ensures the corm grows in the correct orientation, with the shoot emerging upward and the roots growing downward.
If you’re unsure which end is which, think of it like an egg: the pointy end is the "top." This small detail makes a big difference in how well your plants establish.
Don’t forget to adjust your planting depth if your soil is particularly compacted or heavy. In these cases, consider amending the soil with compost or sand to improve drainage before planting. This way, you’re not just guessing at depth—you’re creating the perfect environment for your crocosmia to thrive.
With the right depth, your garden will be bursting with vibrant orange and red blooms come
Step-by-step guide to planting crocosmia bulbs for maximum bloom potential
Planting crocosmia bulbs at the right depth is key to unlocking their full fall bloom potential. These striking corms thrive when nestled just beneath the soil surface, but getting the details right—like soil prep and spacing—will set your garden up for success.
Whether you're a seasoned gardener or a beginner, following these steps ensures your crocosmia will reward you with vibrant, long-lasting blooms year after year.
Timing matters too! The best time to plant crocosmia bulbs is in late summer to early fall (August–September), allowing roots to establish before winter. If you miss this window, spring planting is possible, but fall is ideal.
Let’s dive into the exact planting depth and techniques that guarantee healthy growth and stunning displays.
How Deep to Plant Crocosmia Bulbs
- 1 Prepare the soil: Loosen soil to a depth of 12 inches and mix in compost for drainage. Crocosmia hates soggy roots!
- 2 Planting depth: Place bulbs 2–3 inches deep, with the neck (top) facing upward. Use a trowel to create holes for precision.
- 3 Spacing: Space bulbs 4–6 inches apart in rows 12 inches apart for airflow and growth room. Crowding leads to weak stems.
- 4 Layer soil: Backfill with sandy loam (or perlite for heavy clay) to improve drainage. Avoid compacting the soil around bulbs.
- 5 Water lightly: Give bulbs a gentle watering to settle soil. Avoid overwatering—crocosmia roots need air!
After planting, mulch with 2–3 inches of organic mulch (like straw or shredded leaves) to retain moisture and regulate soil temperature. This step is especially critical in hot climates or dry summers, where bulbs can dry out. Mulch also suppresses weeds, reducing competition for nutrients.
For post-planting care, keep the soil consistently moist but not waterlogged until shoots emerge. Once growth starts, reduce watering slightly to encourage stronger stems. In spring, apply a balanced fertilizer (10-10-10) when foliage appears to fuel blooming.
Avoid fertilizing in late summer, as this can stimulate new growth before winter.
With these steps, your crocosmia bulbs will thrive, producing bold, arching blooms that light up your garden from mid-summer to fall. The key? Precision planting paired with patient care—your future blooms will thank you! 🌸