
Planting
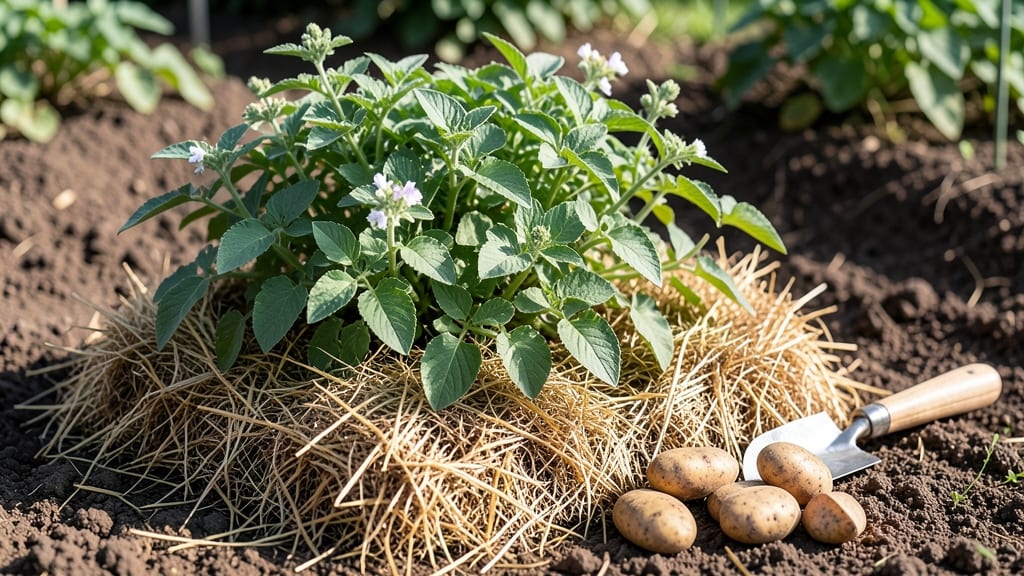
Planting potatoes under straw turns a messy digging job into a foolproof harvest system that works even for beginners. 🌱 I’ve grown hundreds of pounds this way—no fork, no weeds, just layers of straw and earth that protect tubers while they swell underground.
The secret isn’t complicated: straw keeps soil loose, blocks light to prevent greening, and retains moisture better than bare soil ever could. You’ll need a 12-inch-deep trench, seed potatoes cut into chunks with at least two eyes, and enough straw to cover them completely.
No special soil prep—just loosen the top 6 inches, add a handful of compost, and you’re ready. The straw acts like insulation, keeping potatoes cool and preventing scab disease that ruins store-bought tubers. By week 12, you’ll be harvesting golden, blemish-free potatoes with minimal effort.
The method works in containers too, making it perfect for small spaces. Plus, you’ll save time weeding and watering—just add more straw as it breaks down. This technique adapts to any climate, from short-season zones to warm winters. The only rule?
Don’t skimp on straw—3-4 inches at planting, topped up as needed. Ready to try it?
📚 In This Guide
- What you need
- Instructions
- Tips and common mistakes
- Wrapping up and next steps
What you need
- ● Seed potatoes: 5–10 lbs (2–4.5 kg) of certified disease-free, organic seed potatoes (e.g., Yukon Gold, Red Pontiac, or Fingerlings). Choose medium to large potatoes with 2–3 "eyes" (buds).
- ● Straw: 10–15 bales (or ~50–75 lbs / 23–34 kg) of clean, weed-free straw (wheat or oat straw works best). Avoid hay—it contains seeds!
- ● Compost or well-rotted manure: 2–3 gallons (7.5–11 L) per 10 sq ft (1 m²) to enrich the soil.
- ○ Garden fork or broadfork: For loosening soil without digging (optional but helpful).
- ● Garden gloves: To protect your hands from straw and soil.
- ● Watering can or hose: With a gentle spray nozzle for even moisture.
- ● Ruler or measuring tape: To space potatoes 12–15 inches (30–38 cm) apart.
- ○ Shovel or spade (optional): For initial soil prep if your ground is compacted.
- ● Potato clip or chopsticks: To gently lift potatoes when harvesting.
- ● Row covers or lightweight fabric: To protect young sprouts from pests.
- ● Plant markers: If you’re experimenting with multiple varieties.
- ● Mulch (straw or leaves): Extra layer to retain moisture and suppress weeds.
Step-by-Step guide to planting potatoes under straw
Here's how I grow disease-free, high-yield potatoes with minimal effort—no digging required.
🌱 Step 1: Choose Seed Potatoes and Pre-Sprout
Pick certified seed potatoes (not grocery store potatoes—they're treated to prevent sprouting). Cut larger tubers into 2-ounce pieces, ensuring each has at least 2-3 eyes (the little dimples where sprouts emerge). Let them cure for 1-2 days in a dark, dry place so the cut surfaces heal.
Place the pieces on a tray or in a cardboard box with the cut-side up. Keep them in a cool, bright spot (60-65°F) for 3-4 weeks until 1-inch sprouts appear. This jumpstarts growth and gives you a head start on the season. I like to use a sunny windowsill—just avoid direct afternoon sun that can scorch the tender sprouts.
🪴 Step 2: Prepare the Planting Area
Choose a spot with full sun (6+ hours daily) and loose, well-draining soil. If your soil is heavy clay, mix in 2 inches of compost into the top 6 inches of soil to improve drainage. Avoid planting where tomatoes, peppers, or potatoes grew last year to prevent disease buildup.
Mark rows 3 feet apart and create 12-inch-wide beds where you'll mound the straw. This spacing gives your potato plants room to spread and makes harvesting easier. I like to use a garden hose to wet the soil thoroughly before adding straw—it helps the mulch settle better and keeps the soil in place.
🌿 Step 3: Plant and Layer Straw
Lay the pre-sprouted seed potatoes 4 inches deep and 12 inches apart in the prepared bed. Space rows 30 inches apart to allow for easy access and future straw additions. Cover them with 4-6 inches of straw (not hay—straw is cleaner and less likely to contain weed seeds).
Water the bed deeply until the straw is damp but not soggy. The straw will insulate the soil, keeping it warm and protecting the potatoes from temperature swings. As the plants grow, you'll add more straw to mound it higher—this encourages more tuber formation. I check the moisture every 5-7 days and water again when the straw feels dry to the touch.
⏰ Step 4: Maintain and Mound Through the Season
When the potato plants reach 6 inches tall, add another 4-6 inches of straw around the stems, leaving the top 2 inches exposed. Repeat this mounding every 2-3 weeks until the plants flower. This process, called "hilling," prevents greening (toxic solanine buildup) and directs energy into tuber growth.
Keep the straw moist but not waterlogged—it should feel like a damp sponge. Avoid wetting the leaves to prevent disease. Once the plants flower, stop adding straw and let the foliage die back naturally. This signals the tubers to mature. I usually see flowers around 8-10 weeks after planting, and I know harvest time is near when the leaves start yellowing.
💧 Step 5: Harvest and Store Your Potatoes
Wait until the foliage has completely died back before harvesting. Use a garden fork to gently loosen the soil around the plants, then carefully lift the tubers. Shake off excess soil and let them cure in a cool, dark, dry place (50-60°F) for 1-2 weeks to toughen their skins.
Store the potatoes in a paper bag or mesh sack in a dark, humid basement or root cellar. Check them monthly and remove any that sprout or rot. With this method, you'll get 4-5 pounds of potatoes per plant—enough for a family of four to enjoy fresh harvests all season long.
Tips & tricks for planting potatoes under straw
Here's what nobody tells you about growing potatoes this way—these tricks will help you avoid common pitfalls and maximize your harvest.
Sprout Timing Secret: The 3-4 week pre-sprouting period is crucial, but don't rush it. I've seen gardeners impatiently plant potatoes with only tiny sprouts—these often rot underground. Wait until you see 1-inch sprouts (about the length of your pinky finger) before planting. This ensures strong, established plants that emerge quickly from the soil. If your sprouts get too long (over 2 inches), they'll be more fragile when you plant them.
Straw Quality Matters: Not all straw is created equal! Choose clean, golden straw without seed heads or weeds—this prevents unwanted volunteers in your garden. I buy straw bales labeled "clean straw" from farm supply stores. Avoid hay, which contains weed seeds and can introduce diseases. The straw should be dry but not brittle, breaking easily when bent. If your straw smells musty, it's too old and may harbor mold.
Mounding Technique: When you reach Step 4 and start mounding, focus on creating a gentle slope rather than a steep pyramid. This prevents the straw from sliding off during watering. I use my hands to shape the straw into a gentle mound, leaving the top 2 inches exposed as instructed. This gradual slope also helps water penetrate evenly rather than pooling at the base. The key is to maintain this shape every 2-3 weeks—consistency is what builds those deep tuber beds.
Harvesting Hack: The 1-2 week curing period after harvest is often skipped, but it's essential for storage life. Place your freshly dug potatoes in a single layer on a tray or cardboard box in a cool, dark place (50-60°F). This allows the skins to toughen and any minor cuts to heal. I've found that cured potatoes store for 3-4 months without sprouting, compared to just 2 weeks for uncured ones. Just avoid washing them before curing—moisture is the enemy of long-term storage.
Pro Tips for Planting Potatoes Under Straw
- Here's what nobody tells you about growing potatoes this way—these tricks will help you avoid common pitfalls and max...
- Sprout Timing Secret: The 3-4 week pre-sprouting period is crucial, but don't rush it. I've seen gardeners impatientl...
- Straw Quality Matters: Not all straw is created equal! Choose clean, golden straw without seed heads or weeds—this pr...
Frequently asked questions
Got questions about growing potatoes under straw?
You’re not alone! Here are answers to the most common queries to help you master this no-dig method—no stress, just spuds.
How deep should I plant potato seeds under straw?
Plant seed potatoes 4–6 inches deep in loose soil, spacing them 12 inches apart. The straw acts as mulch, not a replacement for soil depth—it regulates temperature and moisture while the potatoes grow upward. Cover with 8–12 inches of straw after planting to protect them from frost and weeds.
When is the best time to harvest potatoes grown under straw?
Start checking for new potatoes (small, tender ones) after 10–12 weeks by gently lifting straw. For full-sized potatoes, wait until the foliage dies back (usually 3–4 months after planting). Harvest on a dry day to avoid soil clumping—just pull back the straw and dig carefully!
Can I reuse straw from last year’s garden?
Yes, but sterilize it first to prevent disease. Spread straw in the sun for 2–3 weeks or microwave it for 5 minutes to kill pests and pathogens. Avoid straw treated with herbicides or pesticides. Fresh, untreated straw is always the safest bet for organic growing!
What do I do if pests (like slugs or cutworms) attack my straw-covered potatoes?
Straw is a natural deterrent, but pests can still sneak in. Encourage predators like birds (add a shallow dish of water nearby) or ground beetles. For slugs, create a diatomaceous earth barrier around the base. If you spot damage, remove infected straw and replace it with fresh, dry straw to break the pest cycle.
Will straw potatoes grow in hot or cold climates?
Straw is adaptable but works best in moderate climates (50–75°F). In hot areas, add extra straw (up to 18 inches) to retain moisture. In cold regions, plant earlier (as soon as soil is workable) and use black plastic mulch under straw for extra warmth. Adjust harvest timing based on your last frost date!
Wrapping up and next steps
Planting potatoes under straw is a game-changer for gardeners—it’s easy, efficient, and yields bountiful harvests in just 12 weeks! 🌱 With minimal effort and no digging, you’ll enjoy tender spuds while enriching your soil naturally.
Whether you’re a beginner or a seasoned gardener, this method simplifies the process and delivers delicious results.
Ready to try it? Start with seed potatoes this spring and watch your garden transform! Share your progress or harvest tips with fellow gardeners—happy planting! 🌟